In this tutorial, you will learn how to:
• Access the Sleep App
• Turn Sleep Mode on or off
• Enable Sleep tracking
• View Sleep chart
• Add or edit a Sleep schedule
• Delete a Sleep schedule
Access the Sleep App
From the Clock screen, press the Digital Crown/Home button. Select the ![]() Sleep app.
Sleep app.
Note: If this is your first time accessing the Sleep app, review the Sleep app prompt then select Next. You will be walked through a short tutorial on how to set your first sleep schedule.
Turn Sleep Mode on or off
Sleep Mode mode will turn off the Watch's display and lock it so it won't wake you up. To turn Sleep Mode on or off, swipe up from the Clock screen then scroll to and select the Do Not Disturb icon then select Sleep. 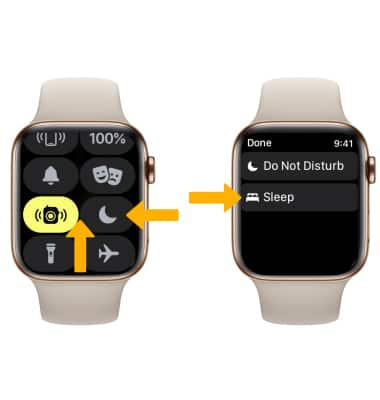
Enable Sleep tracking
1. When in Sleep Mode and worn to bed, Apple Watch will track your sleep and send this data to the Health app. To enable Sleep tracking, from the paired iPhone navigate to and select the ![]() Watch app.
Watch app.
2. Scroll to and select Sleep then scroll to and select the Track Sleep with Apple Watch switch.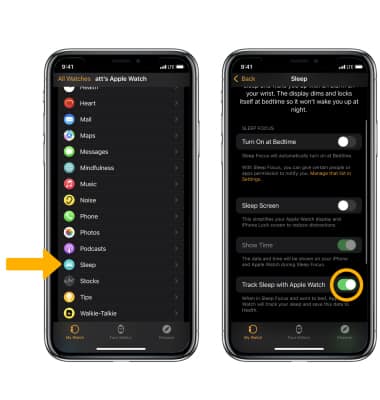
View Sleep chart
1. From the paired iPhone, navigate to and select the ![]() Health app. Select the Browse tab, then scroll to and select Sleep.
Health app. Select the Browse tab, then scroll to and select Sleep.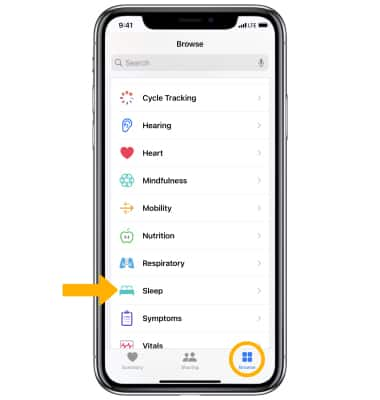
2. A detailed Sleep chart will be displayed.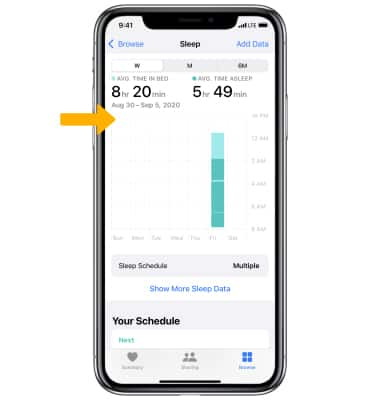
Add or Edit a Sleep Schedule
To edit a Sleep Schedule, from the Sleep app screen select the desired option (Bedtime or Wake up) then edit desired settings.
Note: To edit additional Sleep settings, from the Sleep app screen select Full schedule. Select Sleep Goal to edit your Sleep goal. Select Wind Down to set a time for Sleep mode to turn on before bedtime. 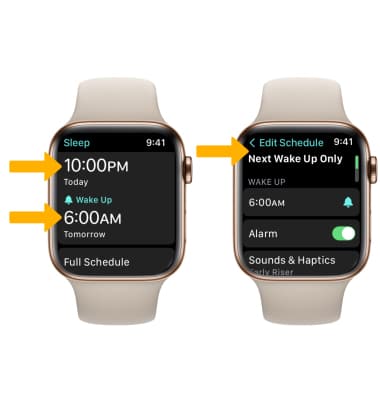
To add a new Sleep Schedule, select Full Schedule > scroll to and select Add Schedule > set desired alert times and settings then select Add. 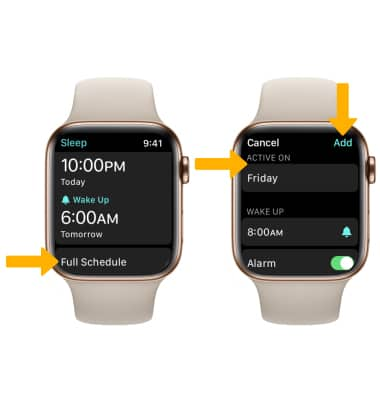
Delete a Sleep schedule
1. From the Sleep app screen, select Full Schedule then select the desired Sleep schedule.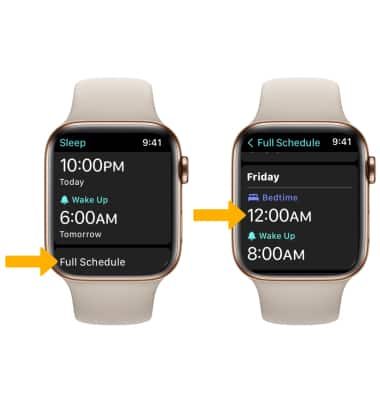
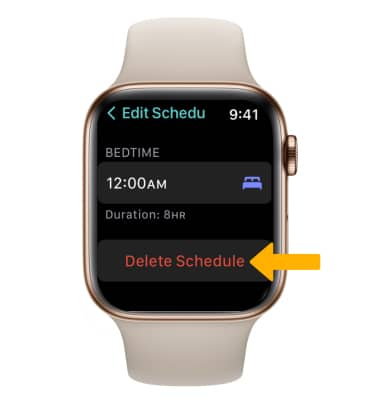
2. Scroll to and select Delete Schedule. 