")
In this tutorial, you will learn how to:
• Use the trackpad
• Use touch gestures
• Disable the trackpad
Use the trackpad
The entire trackpad surface is sensitive to finger touch and movement. The trackpad can be divided into two zones, Left-click (primary zone) and Right-click (secondary zone).
Use touch gestures
POINT: Slide one finger across the surface of the trackpad to move the pointer accordingly.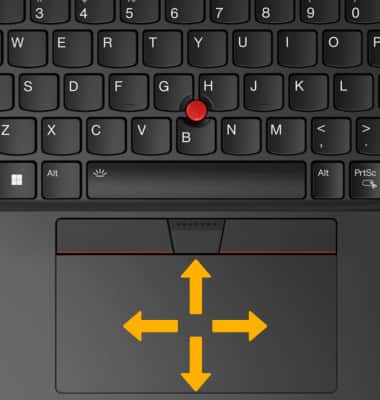
LEFT-CLICK: Press once in the left-click zone to select or open an item.
Note: Alternately, press anywhere on the surface of the trackpad with one finger to preform a left-click.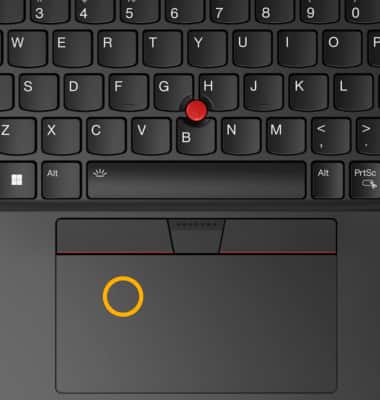
RIGHT-CLICK: Press once in the right-click zone to display a shortcut menu.
Note: Alternately, press anywhere on the surface of the trackpad with two fingers to preform a right-click.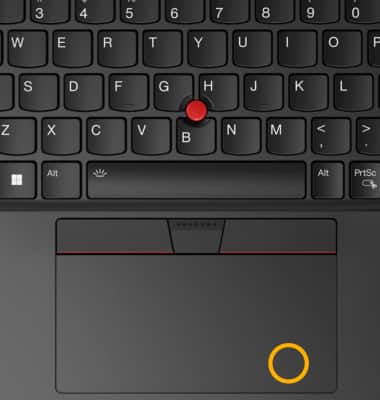
SCROLL: Put two fingers on the trackpad and move them vertically or horizontally to scroll through a document, website, or apps.
Note: When using two fingers, ensure that you position your fingers slightly apart. 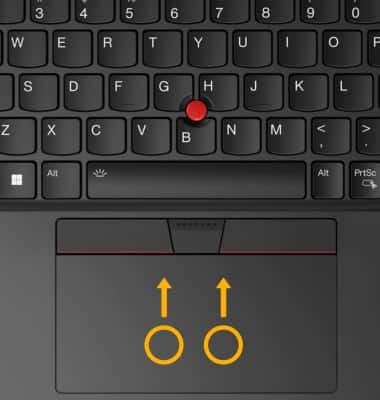
ZOOM IN OR OUT: With two fingers on the tackpad, move fingers apart to zoom in and pinch fingers together to zoom out on webpages or pictures.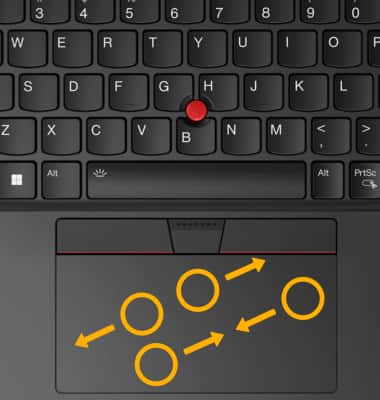
VIEW OPEN WINDOWS: Put three fingers on the trackpad and move them up to open task view to see all open windows.
Note: When using three fingers, ensure that you position your fingers slightly apart. 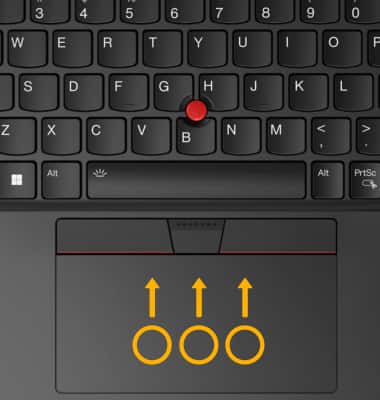
SHOW THE DESKTOP: Put three fingers on the trackpad and move them down to show the desktop.
Note: When using three fingers, ensure that you position your fingers slightly apart.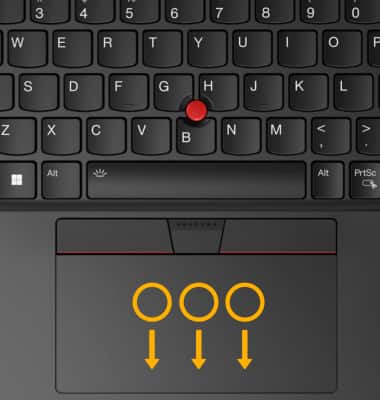
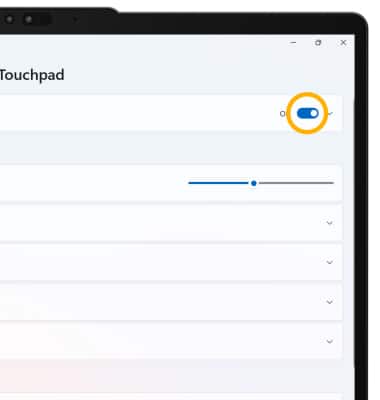
Disable the trackpad
1. The trackpad is active by default. To disable the trackpad, select the Start icon then select Settings.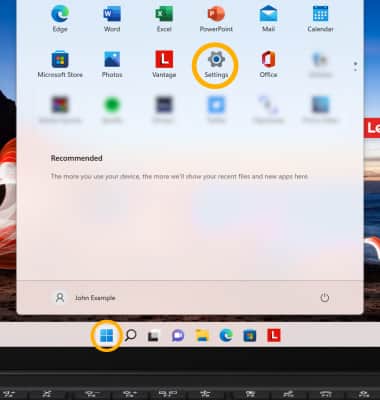
2. Select the Bluetooth & devices tab, then scroll to and select Touchpad.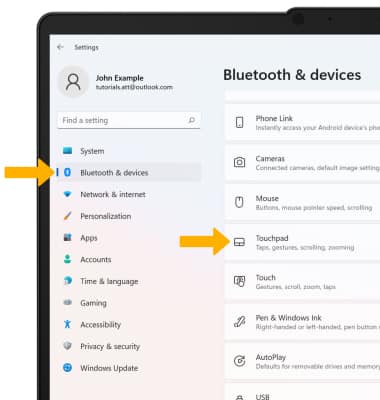
3. Select the Touchpad switch to place it in the Off position.