In this tutorial, you will learn how to:
• Access call forwarding
• Enable call forwarding
• Disable call forwarding
When call forwarding is turned on, the ![]() Call forwarding icon will be displayed in the Notification bar.
Call forwarding icon will be displayed in the Notification bar.
Access call forwarding
1. From the home screen, select the  Phone app. Select the
  Menu icon, then select Settings.

2. Select Calls, then select Call forwarding.
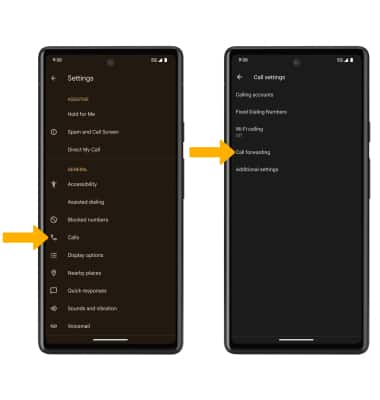
2. Select Calls, then select Call forwarding.
Enable call forwarding
From the Call forwarding settings screen, select Always forward. Enter the desired Call forwarding number, then select TURN ON.

Disable call forwarding
From the Call forwarding screen, select Always forward, then select TURN OFF.
Note: To change the Call forwarding number while Call forwarding is already active, from the Always forward screen, edit the number then select UPDATE.
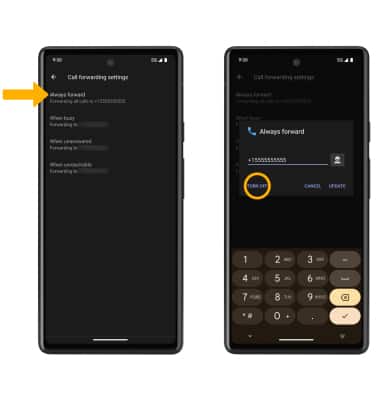
Note: To change the Call forwarding number while Call forwarding is already active, from the Always forward screen, edit the number then select UPDATE.