Device Setup
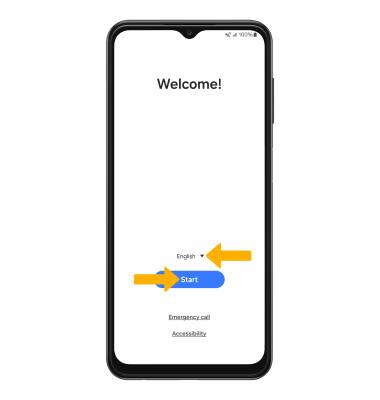
1. When turning the device on for the first time, or after a factory reset, you will be walked through a series of prompts to set up your device. Choose the desired language, then select Start to continue.
2. Select Terms and Conditions, Privacy Policy or Sending of Diagnostic Data as desired to review the device's policies. If you agree, select the desired circles then select Agree.
3. If you would like to set up your device using another device, select the desired operating system and scan the QR code displayed. Select Set Up manually if you would like to set up manually later. Select Skip if you would like to set up your device without copying another from another device.
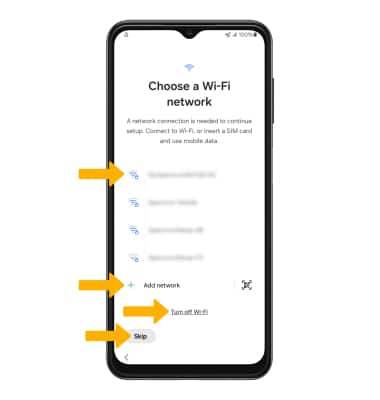
4. If you would like to connect to a Wi-Fi network, select the desired network name and follow the on-screen prompts. To connect to a hidden network, select Add network and follow the prompts. Select Skip to proceed without connecting to Wi-Fi. Select Turn off Wi-Fi to continue setup without connecting to a Wi-Fi network and to turn off Wi-Fi to save battery life.
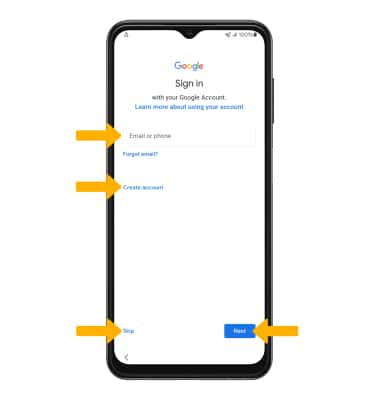
5. Logging into a Google account is required if you intend to use Google Services such as the Play Store, Gmail, Google Maps, and more. If you would like to add your Google account, enter your Email or phone then follow the prompts. If you do not have an account but would like to add one, select Create account. If you would like to continue without setting up an account, select Skip. Select Next to continue.
6. Review the Google Terms of Service, then select I agree to accept.
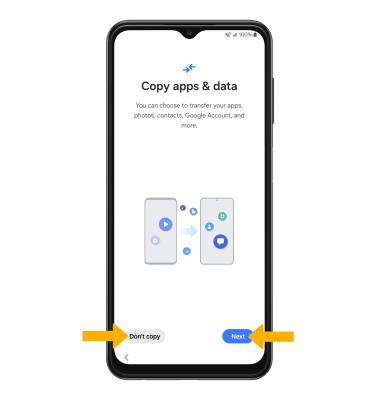
7. If you would like to transfer data from your old device to your new device for quicker setup, select Next and follow the prompts to complete the process. Select Don't copy to continue without transferring your data.
8. Review the Restore data from another device prompt. If you would like to restore data using another device, select the desired backup. Select Don't restore to skip.
9. Review the Google services prompt, then select the desired switches. When finished, select Accept.
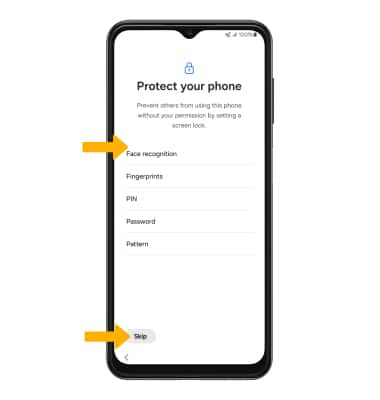
10. If you would like to set your screen lock now, select the desired option and follow the on-screen prompts for setup. To proceed without activating device protection features, select Skip.
Note: If you select Skip, you will be prompted to select Skip anyway to confirm.
11. Review the Access your Assistant with "Hey Google" prompt, then scroll to and select I agree. If you wish to proceed without setting up Access your Assistant with "Hey Google", select Skip.
12. Review the Activate Voice Match to use "Hey Google" prompt, then scroll to and select I agree to set up. If you wish to proceed without activating Voice Match, select No thanks.
13. Review the Access your Assistant without unlocking your device prompt, then select I agree. If you wish to proceed without setting up Access your Assistant without unlocking, select Skip.
14. Review additional apps that you would like to have downloaded to your device when Wi-Fi is available, then select the checkboxes as desired. Select OK when finished.
15. Review the AT&T Mobile Network Diagnostics prompt, then select Accept.
16. If you would like to sign into your Samsung account, enter the phone number or email associated with your Samsung account then select Next. Enter your password, then select Sign in. Follow the prompts to complete setup. If you do not already have a Samsung account, select Create account and follow the on-screen prompts for setup. If you wish to proceed without setting up a Samsung account, select Skip.
17. Review the Samsung Privacy Notice, Terms and Conditions, and Special Terms. If you agree, select the desired circles then select Agree.
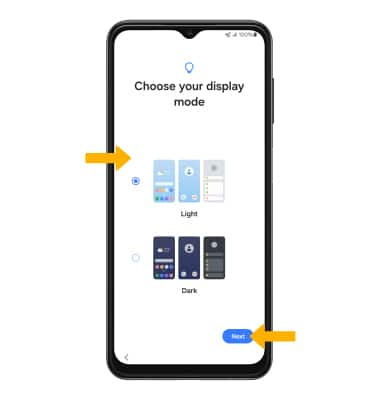
18. Select the desired display preference, then select Next.
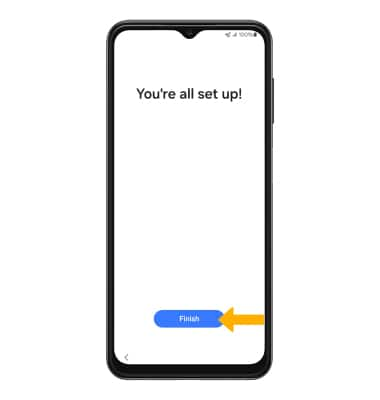
19. Select Finish to complete set up.
