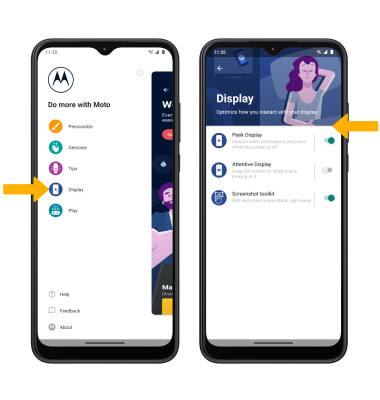
Display
Which device do you want help with?
Display
Change the display brightness, time out and orientation.
INSTRUCTIONS & INFO
View the Optimize Battery Life tutorial for battery-saving tips. View the Accessibility tutorial to learn more about accessibility-related features.
In this tutorial, you will learn how to:
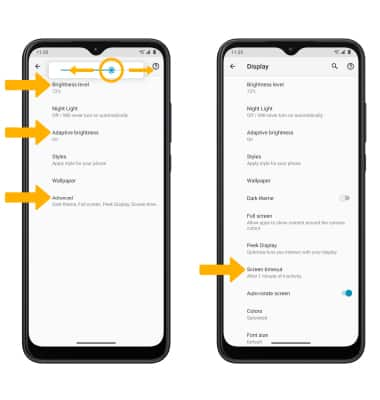
• SCREEN BRIGHTNESS: Select Brightness level, then select and drag the Brightness slider to the desired brightness.
• ADAPTIVE BRIGHTNESS: Select Adaptive brightness then select the Adaptive brightness switch.
• SCREEN TIMEOUT: Select Advanced > Screen timeout > desired option.
• Access display options through Quick Settings
• Access display options through settings
• Edit home screen display
• Access display options through the Moto App
Access display options through Quick Settings
Swipe down from the Notification bar with two fingers to access Extended Quick Settings.
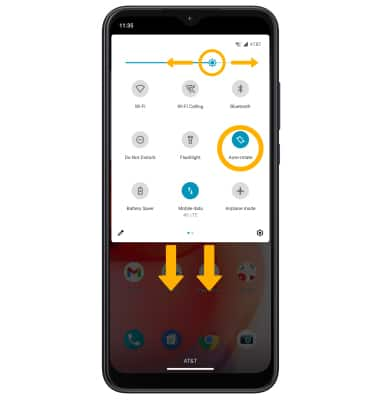
DISPLAY OPTIONS: Select the desired option to enable or disable the display option. You can also select and hold certain display options to access their settings.
DISPLAY OPTIONS: Select the desired option to enable or disable the display option. You can also select and hold certain display options to access their settings.

• SCREEN BRIGHTNESS: Select and drag the Brightness slider at the top of the Quick Settings menu to the desired brightness level.
• AUTO ROTATE: Select the Auto-rotate icon. When enabled, Auto rotate will automatically rotate the device's screen orientation depending on how you are holding it. This feature is disabled on the home screen by default.
• AUTO ROTATE: Select the Auto-rotate icon. When enabled, Auto rotate will automatically rotate the device's screen orientation depending on how you are holding it. This feature is disabled on the home screen by default.
Access display options through Settings
1. Swipe down from the Notification bar with two fingers, then select the  Settings icon.
2. Select Display.
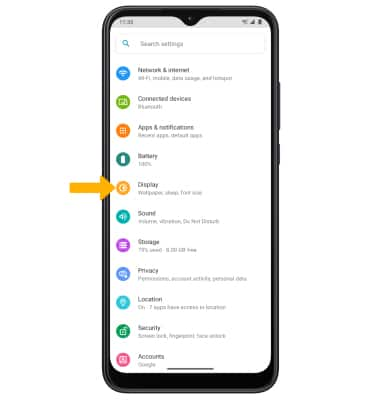
3. Select the name of the desired display option to enable or disable.
2. Select Display.

3. Select the name of the desired display option to enable or disable.

• SCREEN BRIGHTNESS: Select Brightness level, then select and drag the Brightness slider to the desired brightness.
• ADAPTIVE BRIGHTNESS: Select Adaptive brightness then select the Adaptive brightness switch.
• SCREEN TIMEOUT: Select Advanced > Screen timeout > desired option.
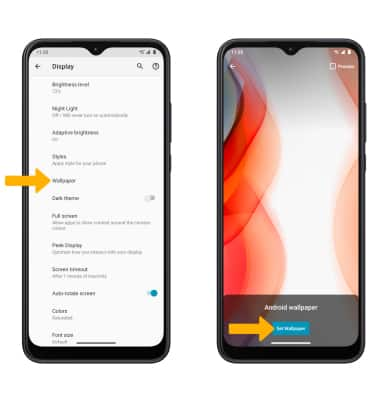
Edit home screen display
From the Display screen, select Wallpaper > navigate to and select the desired wallpaper > select Set Wallpaper.

Access display options through the Moto App
From the Home screen, swipe up to access the Apps tray, then select the  Moto App. Select the
  Menu icon, then select Display. Select the desired switches.
