In this tutorial, you will learn how to:
• Access Samsung Note
• Create a note
• Share a note
• Delete a note
• Adjust Samsung Note settings
Access Samsung Note
Swipe up from the center of the home screen to access the Apps tray, then select the  Samsung Note app.
Note: Samsung Note combines the real note experience with handwriting on text with the convenience of auto-sync and easy folder management. Samsung Note allows you to import and annotate PDFs and share notebooks with contacts. If this is your first time opening the Note app, you asked to configure your page Settings. Select Next to read through the settings, then select Start.
Create a note
1. From the Samsung Note screen, select the ![]() Add icon.
Add icon.
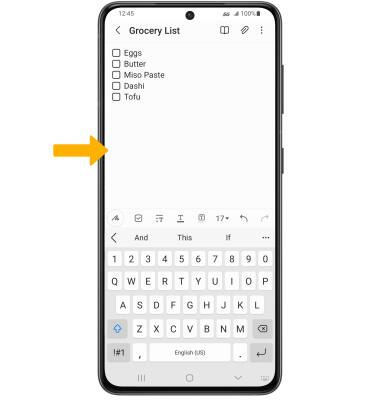
2. To access the keyboard and type a note, select the desired area of the screen.
Note: To change the text style, color and size, select the desired icon at the bottom of the screen.
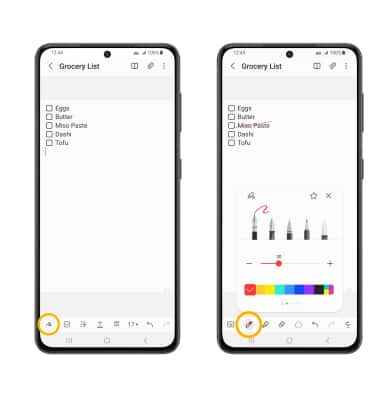
3. To write on the screen, select the Write icon then use your S pen to write on the screen. To change the style and color of writing, select the Pen icon then edit settings as desired.
Note: Pens are sold separately.
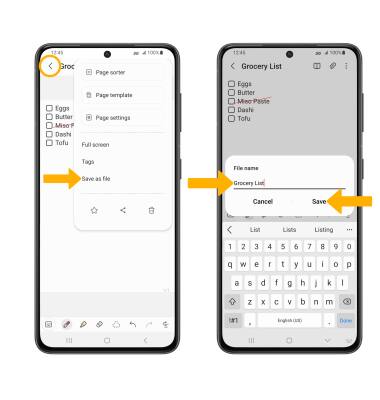
4. When finished, select the back arrow to exit the note. Notes will automatically be saved in Samsung Note. To save the note to another location, select the  Menu icon > Save as file > select the desired file option > navigate to the desired save location > Done > enter desired memo name then select Save.
Share a note
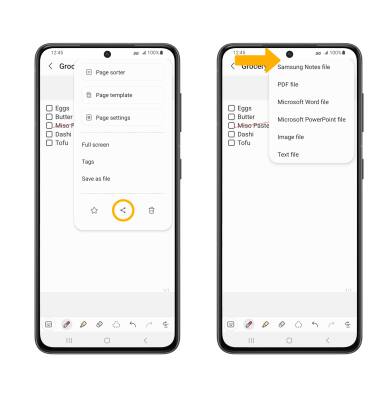
To share a note, from the desired note select the  Menu icon > Share icon > select the desired file option then follow the prompts to share your note.
Delete a note
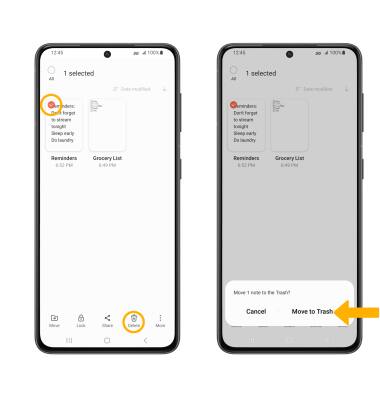
From the Samsung Note screen, select and hold the desired note then select Delete. Select Move to Trash to confirm.
Adjust Samsung Note settings
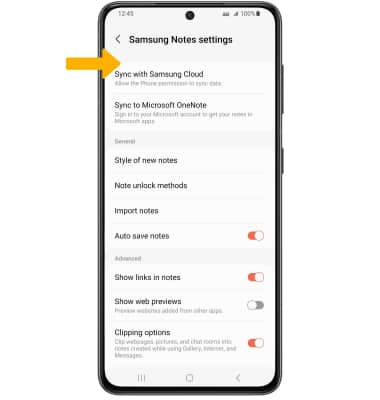
1. From the Samsung Note screen, select the  Menu icon then select the
 ![]() Settings icon.
Settings icon.
2. Editing settings as desired.
