In this tutorial, you will learn how to:
• Set up eSIM
• Manage cellular plans
• Switch cellular plan for phone call
• Switch cellular plan for message
• Erase eSIM
If you are trying to find your EID for your associated eSIM, view the Find IMEI, Serial number, & EID tutorial.
Set up eSIM
1. From the home screen, select the ![]() Settings app.
Settings app.
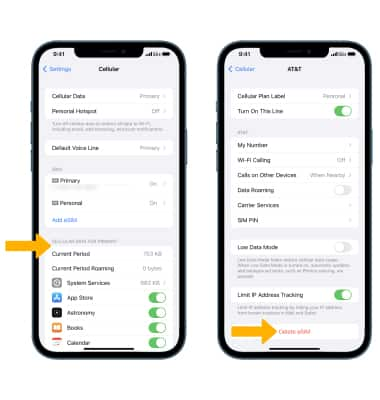
2. Select Cellular, then select Add eSIM.
3. Select Other Options then select Use QR Code.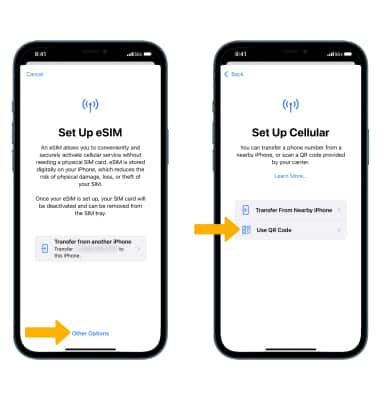
4. Use your iPhone's camera to scan the QR code. Select Enter Details Manually at the bottom of the screen to manually enter your plan information. 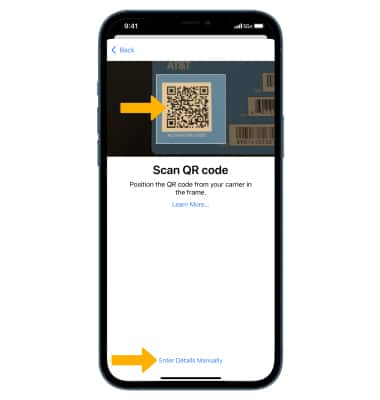
5. Select Continue.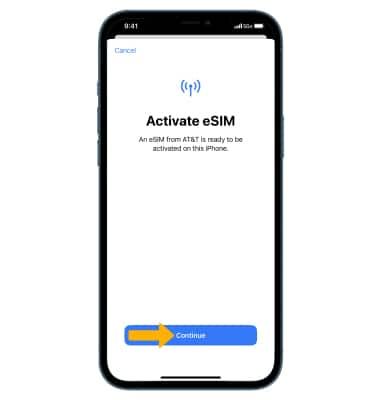
5. Label the Cellular Plans as desired, then select Continue.
Note: To label your plans, select the desired Phone number then select the desired Label or enter a Custom Label. Select Done when finished. 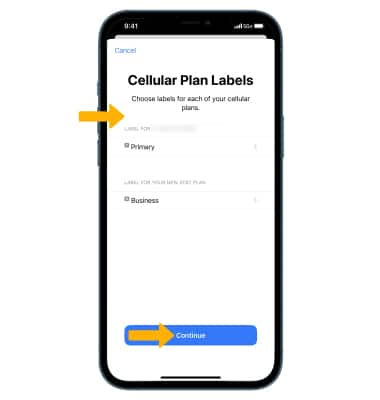
6. Select your Default Line, then select Continue. 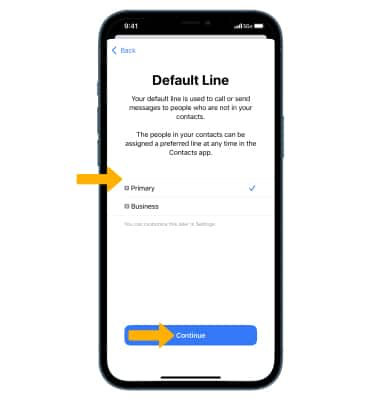
7. Select the desired line to use for iMessage, Facetime and Apple ID, then select Continue. Select the desired line to use for Cellular Data. If desired, select the Allow Cellular Data Switching switch, then select Done.
Note: Both of your phone numbers can make and receive voice calls and send and receive messages. However, your iPhone can only use one cellular data network at a time. Turning on Cellular Data Switching will automatically switch lines for cellular data when you're on a call.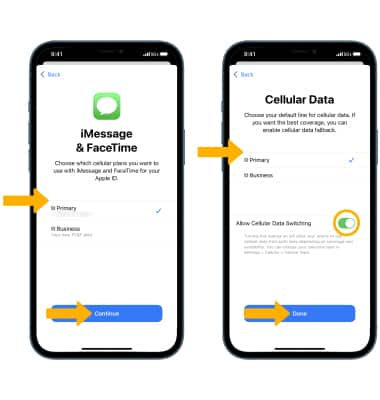
Manage cellular plans
To switch between cellular plans, from the Cellular screen, select the desired plan then edit settings as desired.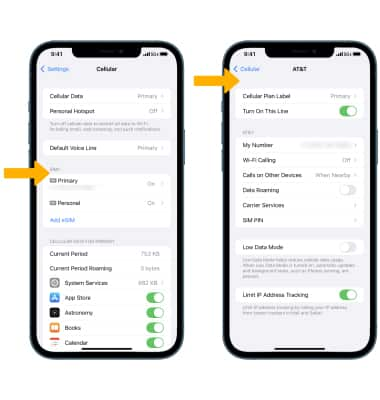
Switch cellular plan for phone call
From the Keypad in the ![]() Phone app, select the current line then select the desired line.
Phone app, select the current line then select the desired line.
Note: While on the current line, incoming calls to the other line will route straight to voicemail.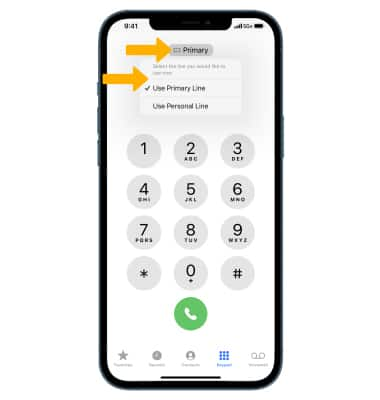
Switch cellular plan for message
When composing a message in the ![]() Messages app, select the current line then select the desired line.
Messages app, select the current line then select the desired line.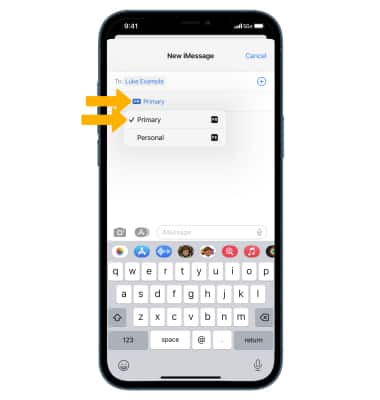
Erase eSIM
From the Cellular menu in Settings, select the desired eSIM number. Select Delete eSIM.
Note: You will be prompted to select Delete eSIM again to confirm. For more information, visit Using Dual SIM with an eSIM.