")
1. From the home screen, select the  Gmail app.
Note: Review the Gmail tutorial, then select GOT IT. The Gmail app allows any email account to be set up even if it is not a Gmail account. If you already have an email account setup and wish to add another account, from the home screen select the
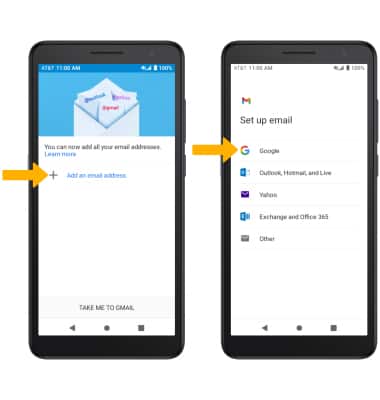
2. Select Add an email address, then select the desired email provider.
Note: For this tutorial, Google was selected. To manually configure email settings (such as server settings and domain), select Other > enter the required information, then select NEXT. If your corporate server requires remote security administration, you will be prompted to set up security features. Select ALLOW to continue.
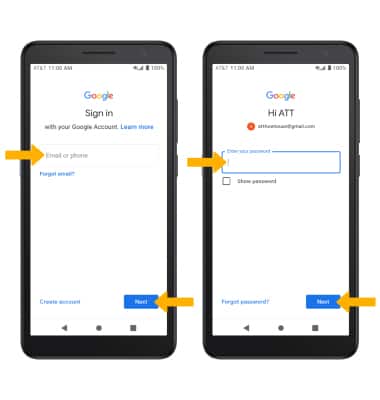
3. Enter the desired Email or phone number, then select Next. Enter the Password, then select Next.
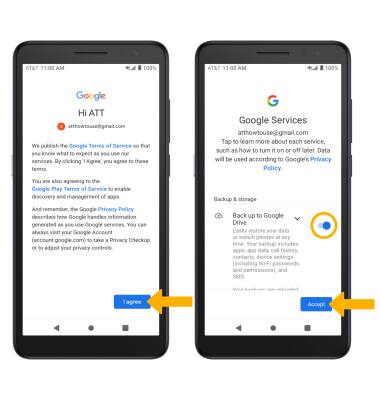
4. Select I agree. Review the Google Services Privacy Policy, then scroll to and select the Back up to Google Drive switch. Select Accept when finished.
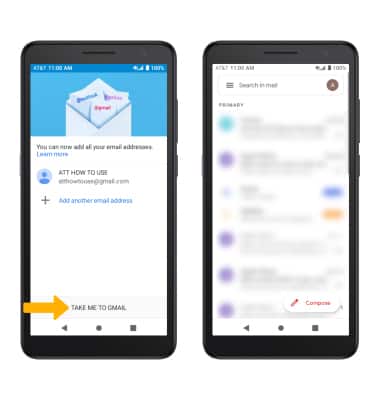
5. Select TAKE ME TO GMAIL. When setup is complete, your Inbox will appear.