Fleet Complete
Which device do you want help with?
Fleet Complete
Remotely monitor multiple vehicles's location, status, vehicle health, and more from one convenient location.
INSTRUCTIONS & INFO
In this tutorial, you will learn how to:
• Access the Tracking Screen
• Access and edit assets
• Use filters
• Run a report
• Export a report
Access the tracking screen
1. The tracking screen displays by default when logged into the Fleet Complete application. The Map items panel displays all Assets and Geofences on the left side of the screen. To search for an Asset or Geofence, click the Search field, then enter the desired Asset or Geofence. Select the desired Asset or Geofence. The Asset or Geofence location will be displayed.
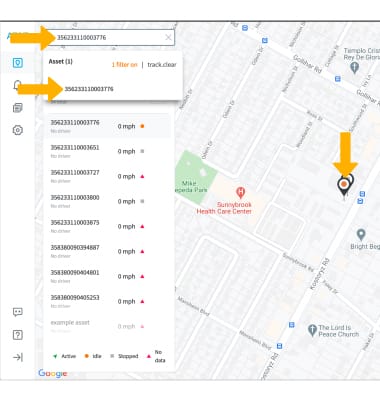

2. The Map area and Map controls displays the location of all Assets and Geofences. To adjust Map settings, click the switches to adjust as desired.
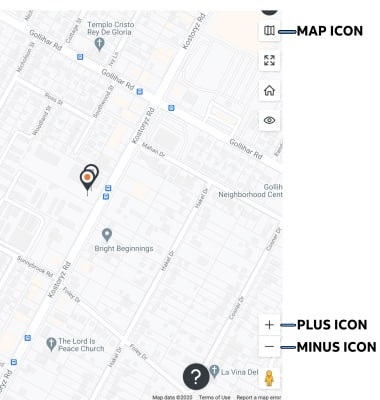

• ZOOM IN OR OUT: Click the Plus icon to zoom in. Click the Minus icon to zoom out.
• CHANGE MAP VIEW: Click the Map icon, then select the desired map view.
Access and edit assets
1. From the FleetComplete application, click the Settings icon then click Assets. To search for an asset; either type the asset in the search bar or scroll the asset list and click on the desired asset.
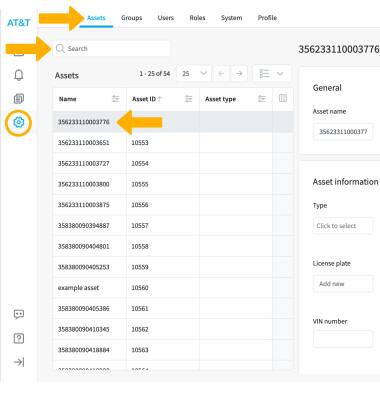

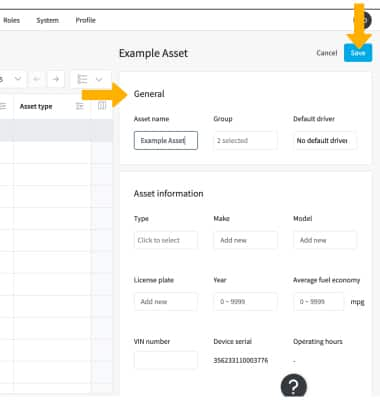
2. Edit the Asset as desired then click Save.
Add a rule
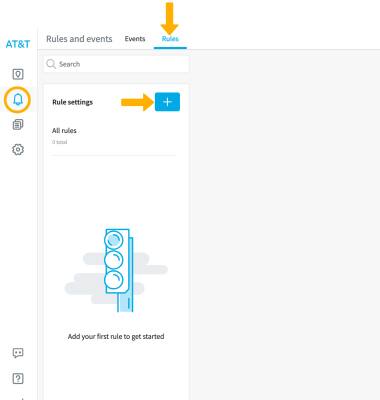
1. From the FleetComplete application, click the Rules and Events icon then click Rules. Click the Add icon.
2. Click the desired Rule type.

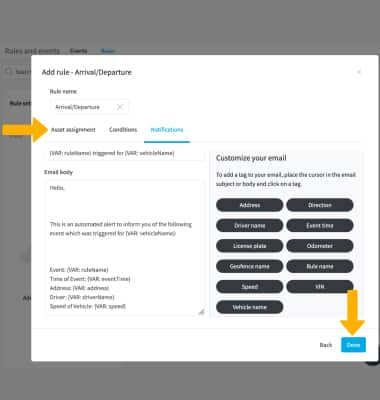
3. Edit the Asset assignment, Conditions, and Notification settings as desired then click Done.
Edit or delete a rule
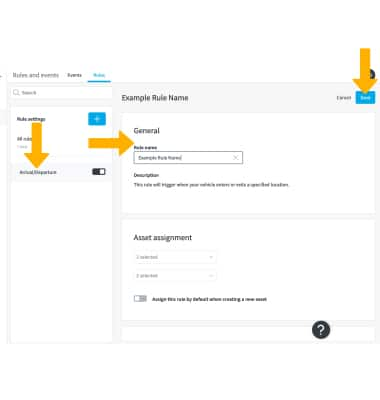
EDIT A RULE: From the Rules screen, click the desired Rule. Edit the Rule as desired then click Save.

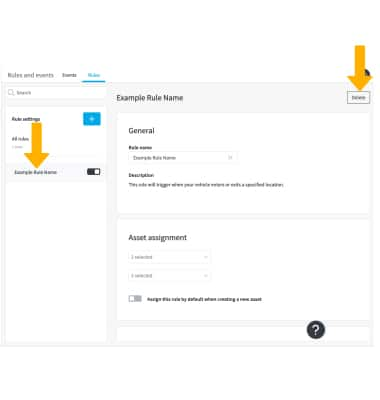
DELETE A RULE: From the Rules screen, click the desired Rule then click Delete.
Note: You will need to click Delete to confirm.
Note: You will need to click Delete to confirm.

Run a report
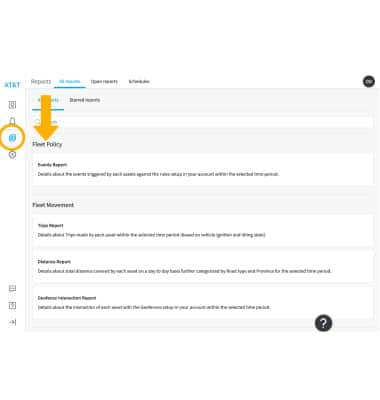
1. From the FleetComplete application, click the Reports icon, then click the desired Report type.

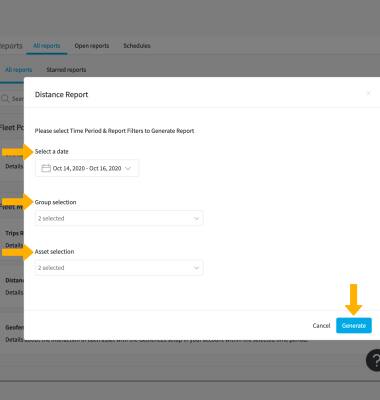
2. Edit the report settings as desired then click Generate.

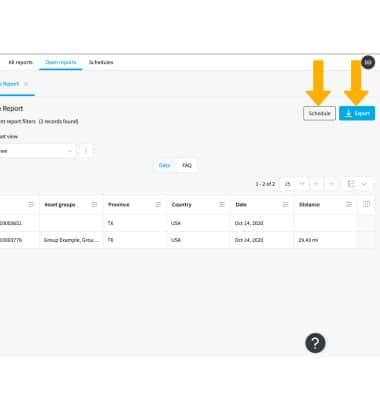
3. Click Schedule to schedule the report, or click Export to export the report. Follow the prompts to schedule or export the report.
Tips
For additional assistance, please contact the Fleet Complete Suport team at support@fleetcomplete.com or 1-844-684-3262. For self-help and troubleshooting options, refer to the Resource Portal. Your request will be answered within 24 hours.