")
In this tutorial, you will learn how to:
• Stop an app
• Check for an iOS update
• Check for app updates
• Remove an app
• Reinstall an app
• Manage app data
Stop an app
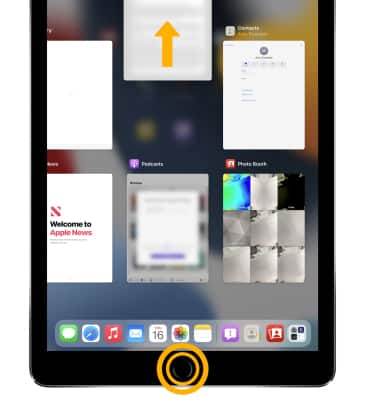
Press the the Home button twice to view recent apps. Swipe the desired app upward to close the app.
Note: Alternately, swipe up from the bottom of the screen without removing your finger to view recent apps.
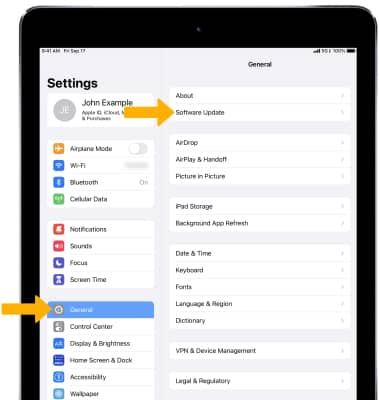
Check for an iOS update
Plug your device in to power and connect to the Internet with Wi-Fi, then from the home screen select the ![]() Settings app > General > Software Update.
Settings app > General > Software Update.
Note: If an update is available, select Download and Install then follow the on-screen prompts.
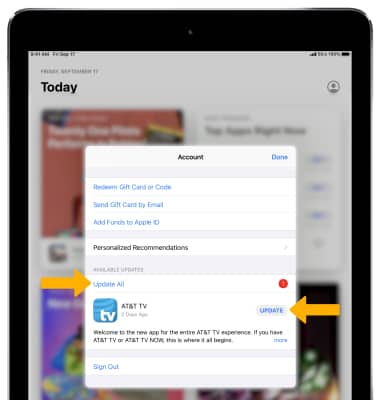
Check for app updates
1. From the the home screen, select the ![]() App Store app then select the
App Store app then select the ![]() User account icon.
User account icon.
2. App updates will be listed under AVAILABLE UPDATES. Select UPDATE next to the desired app to update an individual app. Select Update All to update all apps with an available update.
Note: Automatic app updates is on by default. To save battery life, turn off auto updates. From the home screen, select the ![]() Settings app > App Store >
Settings app > App Store > ![]() App Updates switch.
App Updates switch.
Remove an app
1. Select and hold the desired app then select Remove App.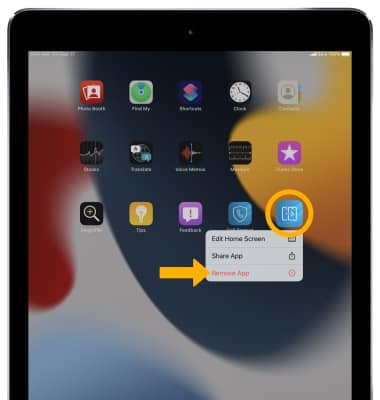
2. Select Delete App.
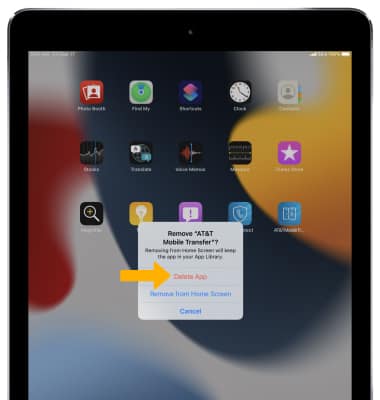
3. Select Delete.
Reinstall an app
1. From the home screen, select the ![]() App Store app > Search > Search field > desired app > select the
App Store app > Search > Search field > desired app > select the ![]() Download icon next to the desired app.
Download icon next to the desired app. 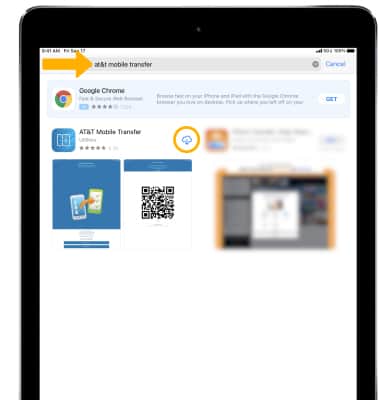
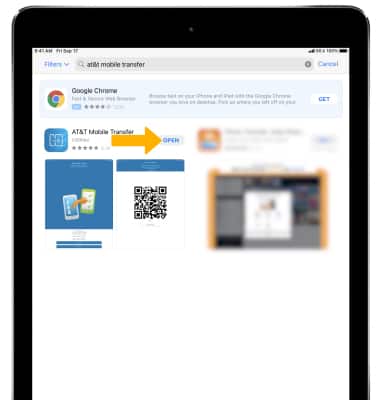
2. The app will take a moment to download. When finished, select OPEN.
Note: Learn more from the Apple support article Download past purchases from iTunes.
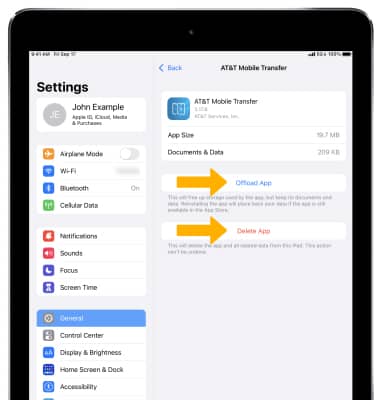
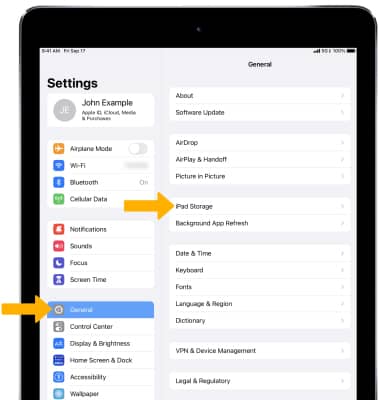
Manage app data
1. From the home screen, select the ![]() Settings app.
Settings app.
2. Select General, then select iPad Storage.
3. Scroll to and select the desired app. 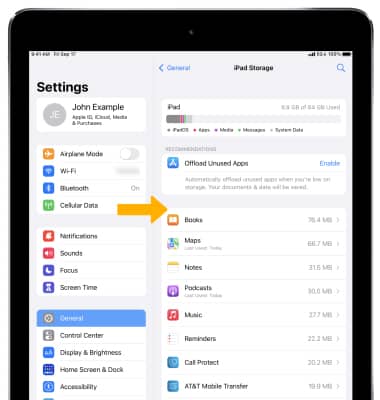
4. Select Offload App to delete the app but keep its documents and data. Select Delete App to delete the app and all related data.