In this tutorial, you will learn how to:
• Access camera modes
• Access Macro mode
• Customize photo and video settings
• Crop a photo
• Access camera filters
Access camera modes
From the Camera app, swipe right to access modes such as Portrait, Spot Color, Panorama, Live Filter, Slow Motion, and Timelapse. Select the desired option.
Note: Portrait allows you to highlight the subject of a photo by blurring the background. Spot Color allows you to select a color to highlight. Panorama allows you to create wider photos by stitching together multiple photos. Live Filter allows you to see the camera through different filters. Slow Motion allows you to create slowed down videos. Timelapse allows you to create time-lapse videos. Not all of these options are available when using the front facing camera.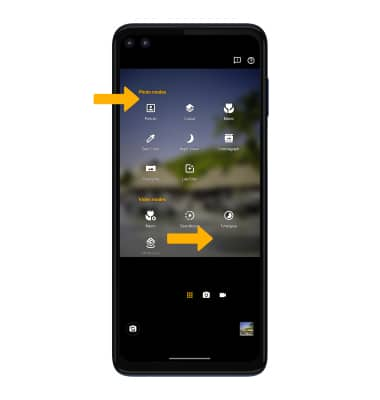
To switch to Manual mode select the Auto camera icon, then select Manual.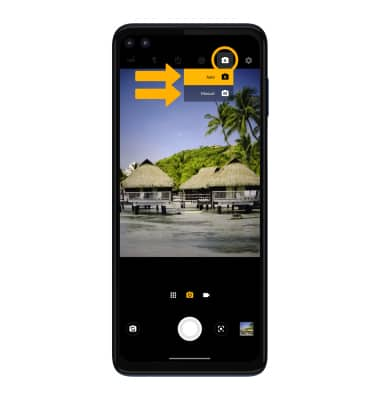
To access Google Lens, select the Google Lens icon then follow the prompts to use. 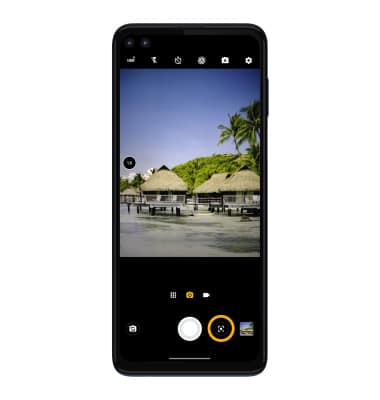
Access Macro mode
Macro mode allows you to capture fine details with crisp, close-up photos and videos. From the Camera app, swipe right to access Camera modes then select Macro photo mode or Macro video mode.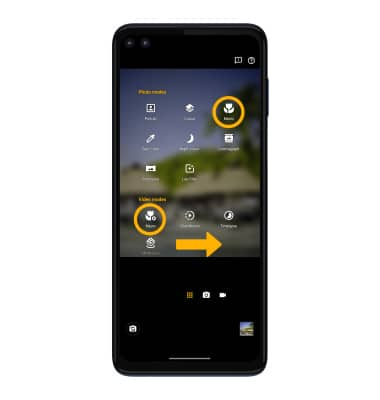
Macro torch allows you to take high resolution pitctures in low light by keeping the flash on for an extended period of time. To access torch settings, from the Macro mode screen select the Torch icon then select the desired option.
Note: Macro torch is on Auto mode by default. 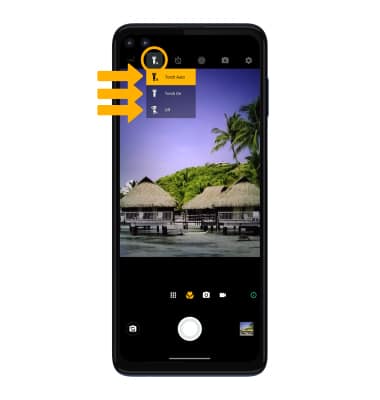
Customize photo and video settings
From the Camera app, select the ![]() Settings icon. Adjust settings as desired.
Settings icon. Adjust settings as desired. 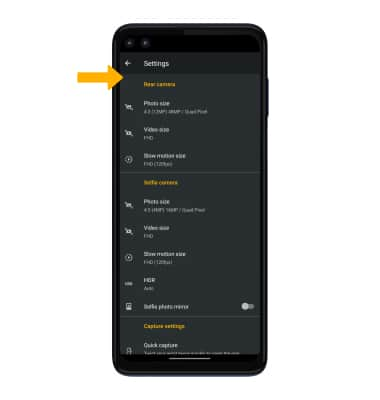
Crop a photo
1. From the Camera app, select the Gallery icon. Swipe left to the desired photo, then select the Edit icon.
Note: Alternately, from the home screen select the Google folder > ![]() Photos app > navigate to and select the desired photo.
Photos app > navigate to and select the desired photo.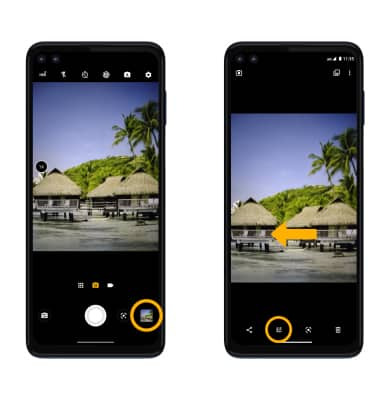
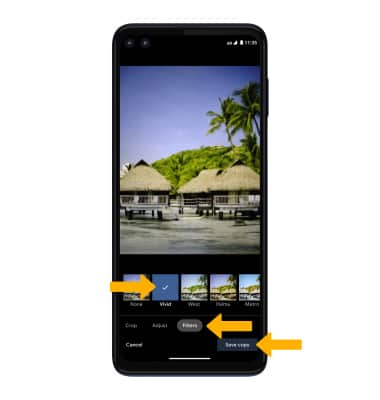
2. Select Crop. Select and drag the crop corners to crop as desired, then select Save copy.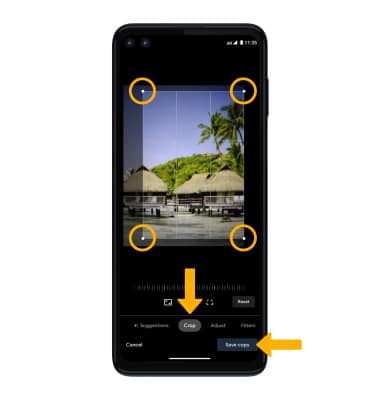
Access camera filters
From the Edit screen, select Filters. Select the desired filter, then select Save copy.