In this tutorial, you will learn how to:
• Access camera modes and filters
• Create and use custom filters
• Customize photo and video settings
• Turn shutter sound on/off
• Use Super Steady Mode
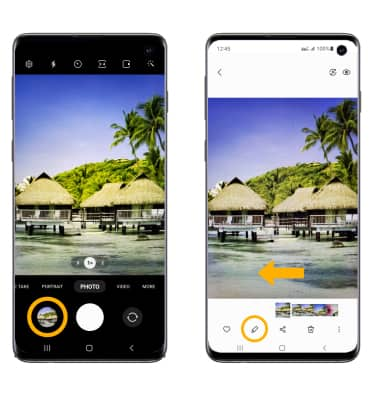
• Crop a photo
Access camera modes and filters
1. From the Camera app, swipe left or right to access camera modes. To access additional camera modes such as Pro, Panorama, Slow motion and Hyperlapse, swipe left to MORE then select the desired option.
Note: Pro allows you to manually adjust settings such as ISO, shutter speed and exposure levels. Panorama allows you to create wider photos by stitching together multiple photos. Slow motion allows you to record videos at a high frame rate which can be played in slow motion. Hyperlapse allows you to capture changes that happen slowly in a smooth time-lapse video.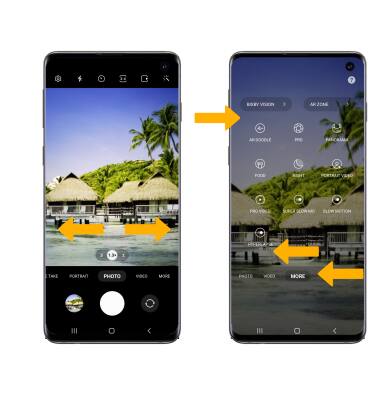
2. To access filters, select the ![]() Filters icon then select the desired filter.
Filters icon then select the desired filter.
Note: Filters are not available in some camera modes.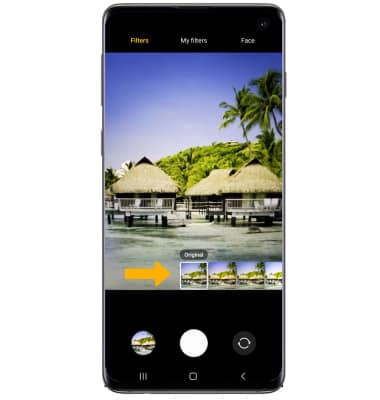
Create and use custom filters
1. To create a custom filter based on a picture from your Gallery, select the ![]() Filters icon.
Filters icon.
2. Select My filters, then select the Add icon.
3. Navigate to and select the desired photo that you like the look of, then select Create. A custom filter will be created.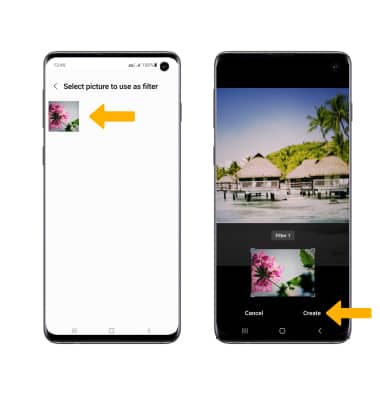
4. To use custom filters, from the My filters screen, select the desired custom filter then select the Capture icon.
Note: To change the intensity of the filter, select and drage the Intensity slider.
Customize photo and video settings
From the Camera app, select the ![]() Settings icon then edit settings as desired.
Settings icon then edit settings as desired.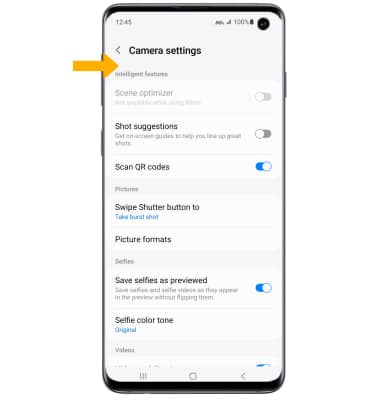
Turn shutter sound on/off
From the Camera settings screen, scroll to and select the Shutter sound switch.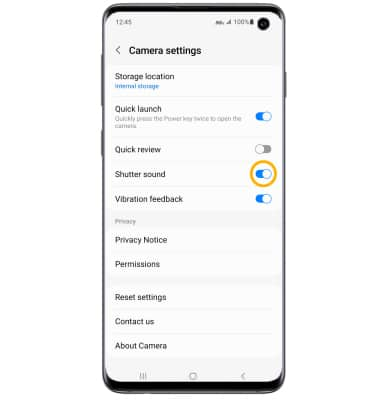
Use Super Steady Mode
Use Steady Mode to stabilize your camera while recording a video. From the Camera screen, swipe left to access Video mode then select the Super Steady icon.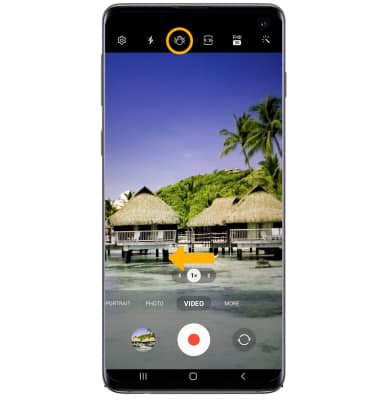
Crop a photo
Note: Alternately, from the home screen, select the
