• Set the date and time
• Change the time zone
• Set an alarm
• Turn an alarm on or off
• Delete an alarm
• Use bedtime mode
• Use bedtime mode
Set the date and time
1. From the home screen, swipe down from the Notification bar then select the  Settings icon.
2. Scroll to and select System, then select Date & time.
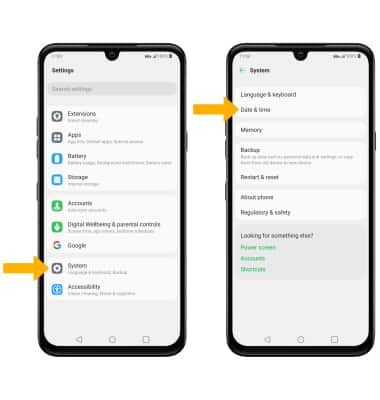
3. Select the Set automatically switch to disable.
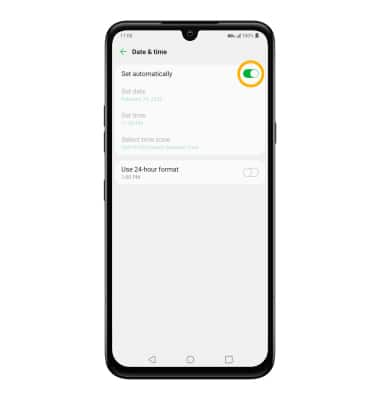
2. Scroll to and select System, then select Date & time.

3. Select the Set automatically switch to disable.

4. To change the date or time, select the desired option. Edit as desired, then select OK.
Note: For this tutorial, Set date was selected.
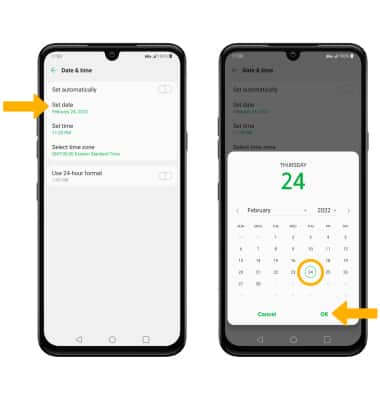
Note: For this tutorial, Set date was selected.

Change the time zone
From the Date & time screen, select Select time zone then select the desired time zone.
Set an alarm
1. From the home screen, swipe left then select the Essentials folder. Select the  Clock app.
 Clock app.
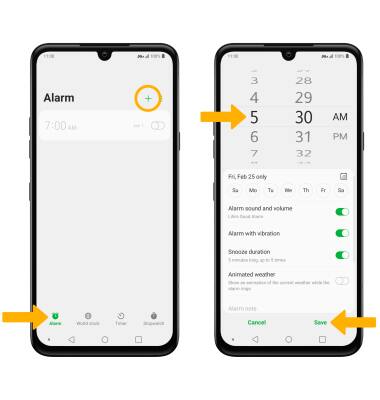
2. Select the Alarm tab, then select the Add icon. Set desired alarm time and settings, then select Save when finished.
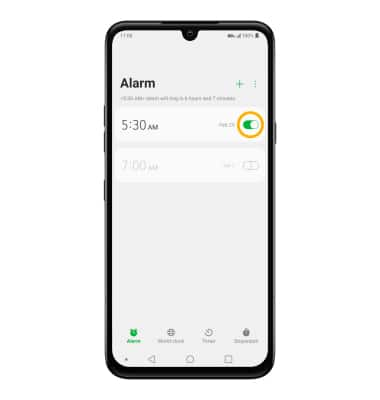
Turn the alarm on or off
Select the switch next to the desired alarm to turn on or off.
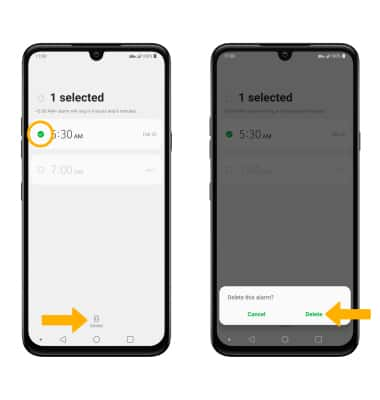
Delete an alarm
Select and hold the desired alarm, then select Delete. Select Delete again to confirm.
Use bedtime mode
1. Enabling Bedtime mode will automatically darken your screen and set your phone to Do Not Disturb during sleeping hours. From the home screen, swipe down from the Notification bar, then select the ![]() Settings icon. Scroll to and select Digital Wellbeing & parental controls.
Settings icon. Scroll to and select Digital Wellbeing & parental controls.
Note: If it is your first time accessing Digitial Wellbeing & parental controls, select the desired option.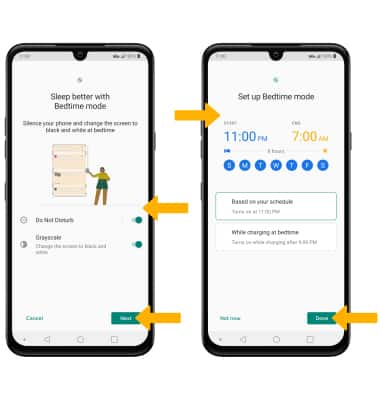
2. Select Bedtime mode.
3. Select the desired switches, then select Next. Edit the schedule as desired, then select Done.

