")

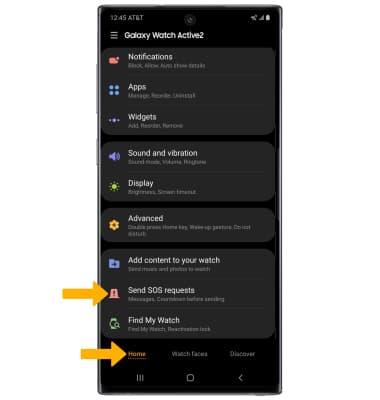
2. Select the Home tab, then scroll to and select Send SOS requests.
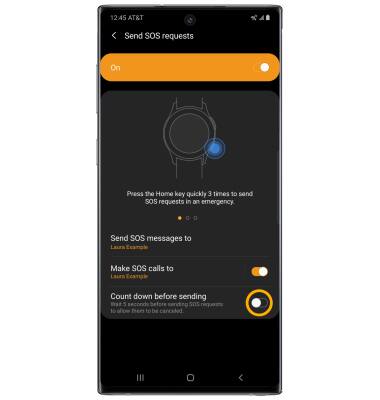
3. Select the SOS switch to place it in the on position.
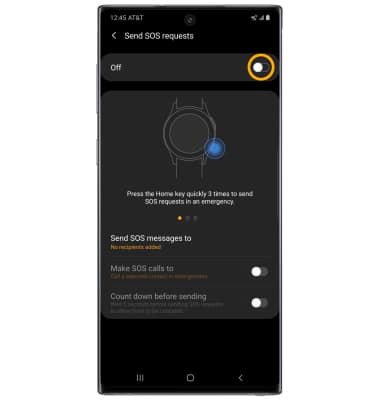
4. Review the Terms and conditions, then select I have read and agree to all the terms and conditions above. Select Agree to continue.

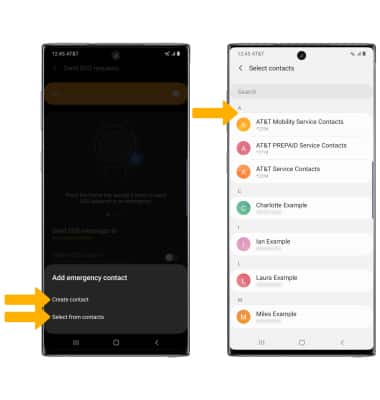
5. Select Add.

6. Select the desired Add emergency contact option, then select the desired contact.
Note: For this tutorial, Select from contacts was selected.
7. From the Send SOS request screen, select the Make SOS calls to switch then select the desired contact.
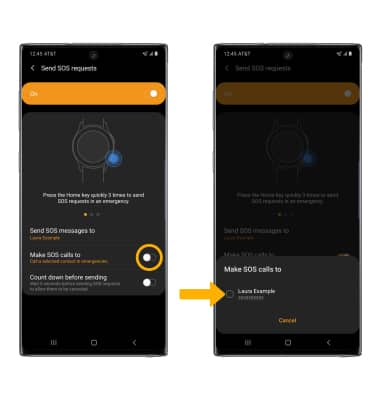
8. Select the Count down before sending switch to delay the SOS call for 5 seconds.
9. USE SOS: Quickly press the Power/Home button three times.