Set Up Email
To manually configure email settings (such as server settings and domain), select MANUAL SETUP, enter the required information, then select NEXT. If you don't know this information, please contact your email provider for assistance. If your corporate server requires remote security administration, you will be prompted to set up security features. Select OK to continue. Visit the Email Settings tutorial to learn how to add email accounts, change incoming and outgoing server settings, email signature, sync frequency, and more.
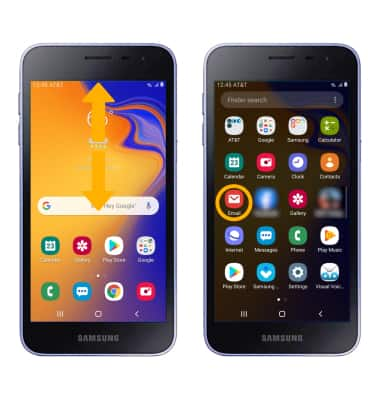
1. Swipe up or down from the center of the home screen to access the Apps tray, then select the Email app.
Note: If you have an email account already set up and would like to add another, from the Email app, select the ![]() Menu icon >
Menu icon > ![]() Settings icon > Add account > enter desired account information and follow the prompts. If multiple accounts are configured, from the Email settings screen, select the Menu icon > Set as default account > desired account > Done, if desired. When in Easy mode, you can't set an account as your default account or enter manual email setup.
Settings icon > Add account > enter desired account information and follow the prompts. If multiple accounts are configured, from the Email settings screen, select the Menu icon > Set as default account > desired account > Done, if desired. When in Easy mode, you can't set an account as your default account or enter manual email setup.

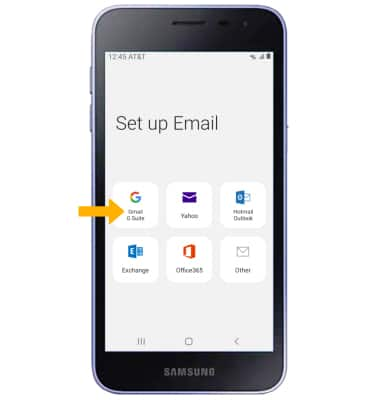
2. Select the desired email account provider.
Note: For this demonstration, Gmail was selected. 
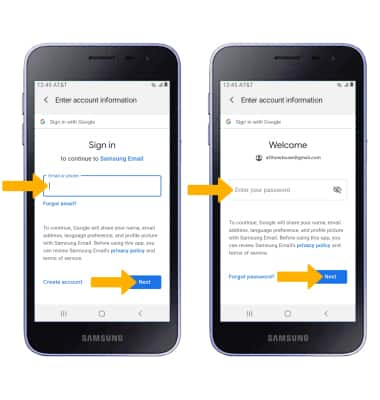
3. Enter the desired Email address, then select Next. Enter your Account password, then select Next.
Note: If prompted, review permissions, then select Allow or Deny. To manually configure email settings (such as server settings and security type), select Other > enter the required information > Manual setup > follow prompts to complete set up. If you don't know this information, please contact your email provider for assistance. If your corporate server requires remote security administration, you will be prompted to set up security features. Select OK to continue. Manual setup is only available for certain email providers. 
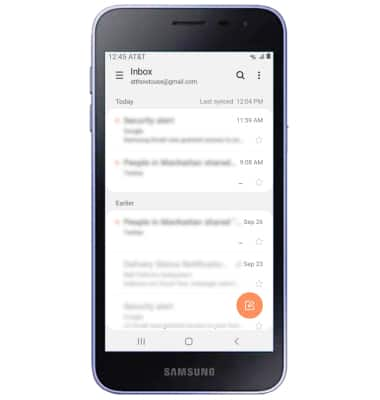
4. Your email account is now set up.