")

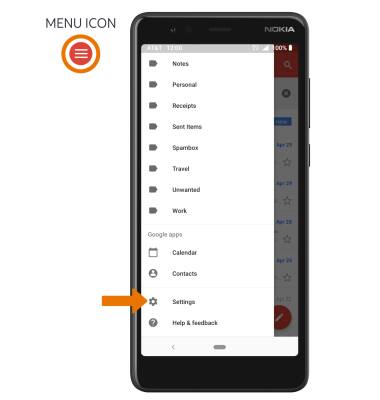
2. Select the Menu icon, then scroll to and select Settings.
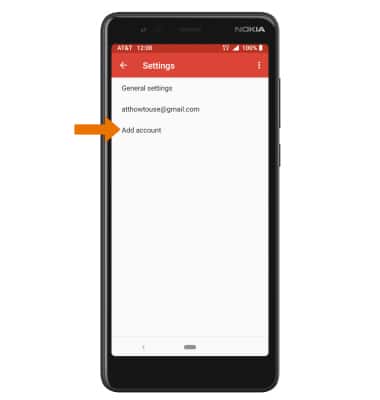
3. ADD NEW ACCOUNT: Select Add account, then follow the on-screen prompts.
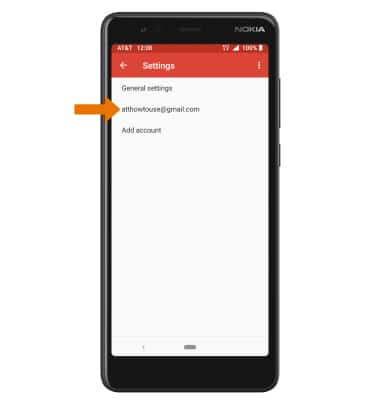
4. EDIT EMAIL ACCOUNT SETTINGS: From the email Settings screen, select the desired email account.
5. EDIT SYNC SETTINGS: From the desired email account, scroll to and select Days of mail to sync > desired sync frequency > OK.

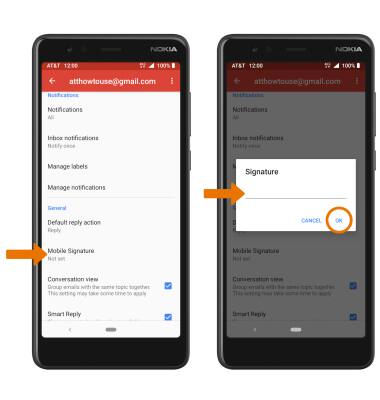
6. ADD/EDIT SIGNATURE: From the desired email account, scroll to and select Mobile Signature > adjust Signature as desired > select OK.
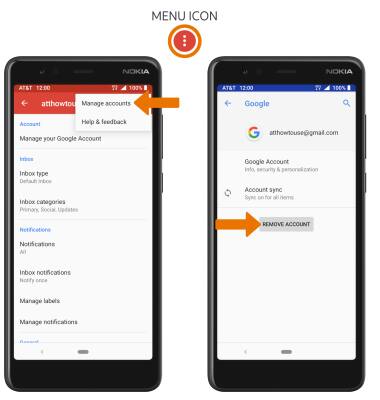
7. REMOVE ACCOUNT: Select the Menu icon > Manage accounts > desired account > REMOVE ACCOUNT.
Note: You will be prompted to select REMOVE ACCOUNT to confirm.