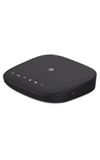
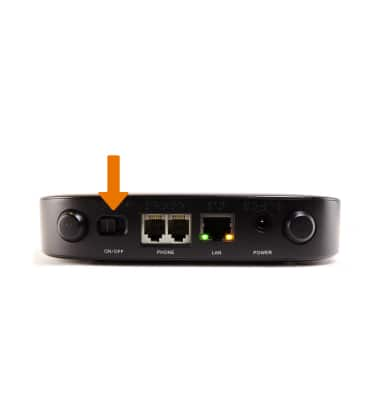
- Make sure your AT&T Wireless Internet device is powered on. Use the ON/OFF switch to turn the device on.
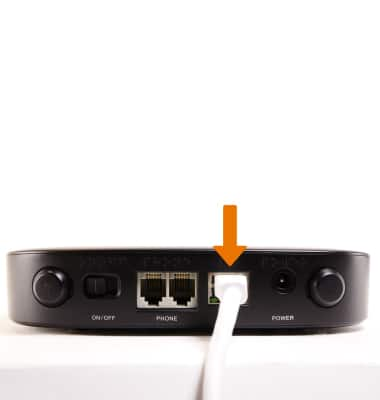
- CHECK ETHERNET CABLE: Make sure that the Ethernet cable is securely inserted into the LAN port on the back of the AT&T Wireless Internet device and your computer (or other device).
- CHECK WI-FI CONNECTION: Make sure the device is located in the general area of your Wi-Fi enabled device. Make sure that you are connected to the AT&T Wireless Internet Wi-Fi network (e.g. ATT-WI-XXXX) and you are using the correct Wi-Fi Password.
Note: Your Wi-Fi password can be found on the bottom of your AT&T Wireless Internet, if you have not changed it. Move your AT&T Wireless Internet to an area with a strong cellular signal, typically near a window or an outside wall.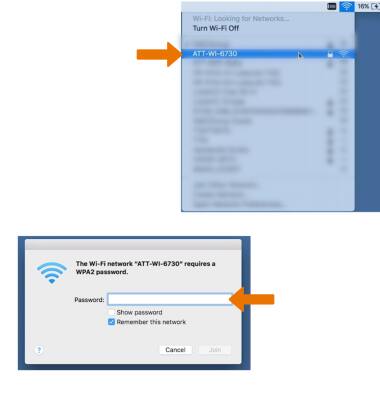
- Make sure the Wi-Fi light is on. If not, restart your device by using the ON/OFF switch.
Note: When the Wi-Fi light is on, the Wi-Fi network is active. When the Wi-Fi light is blinking green, the Wi-Fi network is active and transmitting data.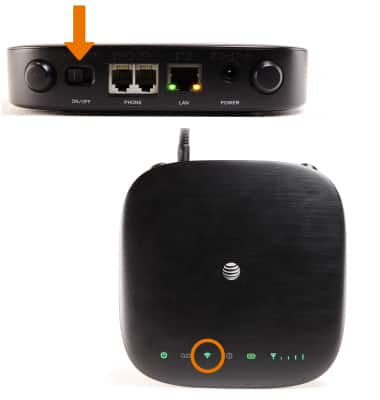
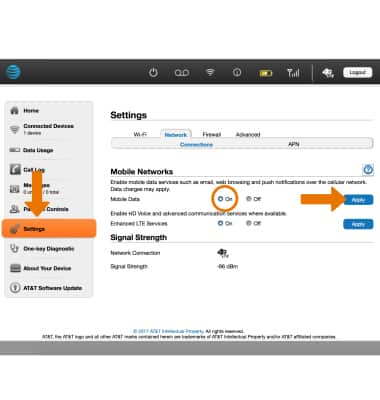
- From http://att.wirelessinternet, click the Settings tab > Network > Connections > click the Mobile Data circle next to ON. Click Apply when finished.
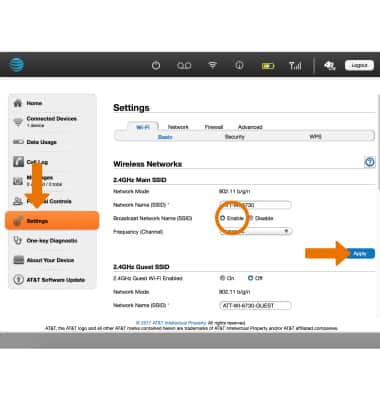
- From http://att.wirelessinternet, click Settings > Wi-Fi > Basic and make sure Broadcast Network Name (SSID) is enabled. Click Apply when finished.
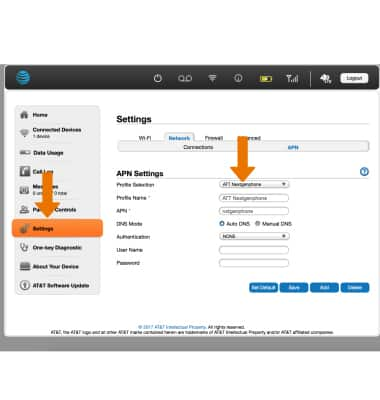
- From http://att.wirelessinternet, click Settings > Network > APN and check that the Profile selection is set to ATT Nextgenphone. Click Apply when finished.
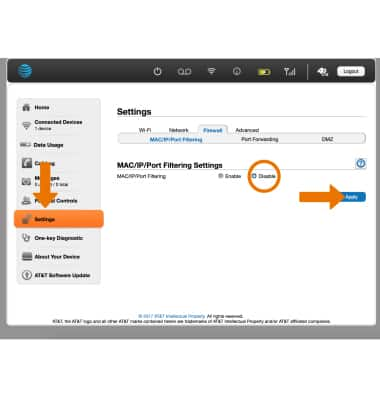
- From http://att.wirelessinternet, click Settings > Firewall > MAC/IP/Port Filtering > click the Disable circle. Click Apply when finished.
Internet Access Issues
AT&T Wireless Internet (MF279)
Internet Access Issues
Try these troubleshooting methods if your AT&T Wireless Internet cannot access the internet.
INSTRUCTIONS & INFO
