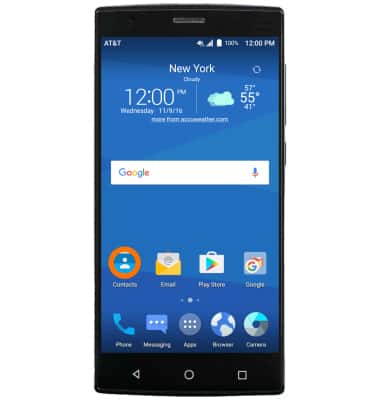
- To access contacts, select the Contacts icon.
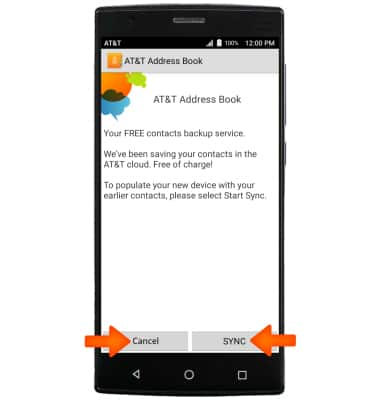
- Review the AT&T Address Book prompt, then select SYNC to sync contacts from an older device and backup new contacts. Select Cancel to continue to Contacts without syncing.
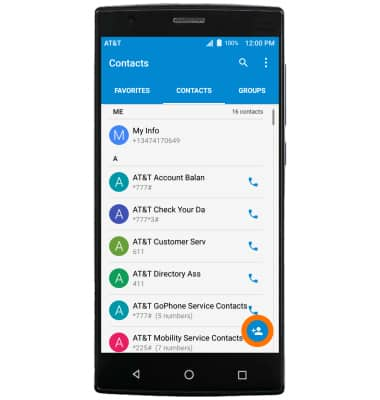
- To create a contact, select the Plus icon.
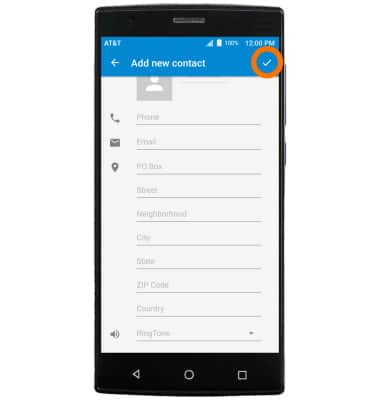
- Enter the Desired contact information and select the Check icon. To customize your contact further, select More Fields.
Note: For this demonstration, More Fields was selected.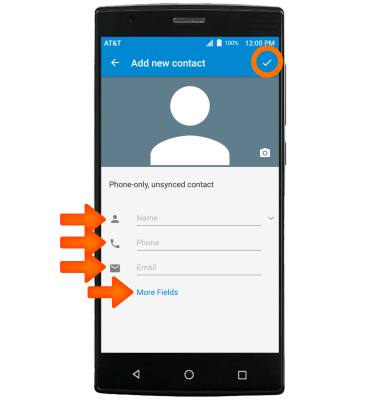
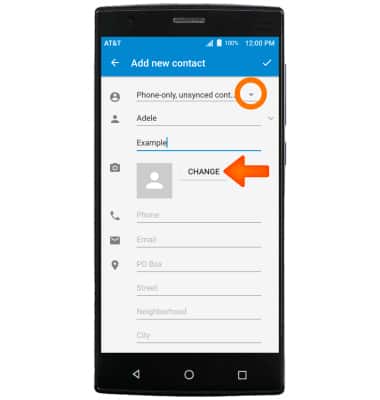
- To change the storage location, select the Drop-down icon, then select the Desired storage location. To add a picture to a contact, select CHANGE, select the Desired source, and then follow the prompts to navigate to the Desired image.
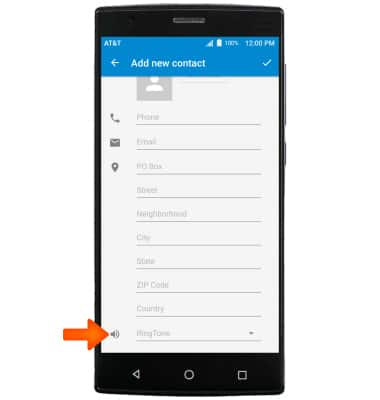
- To add a ringtone, scroll down and select Ringtone.
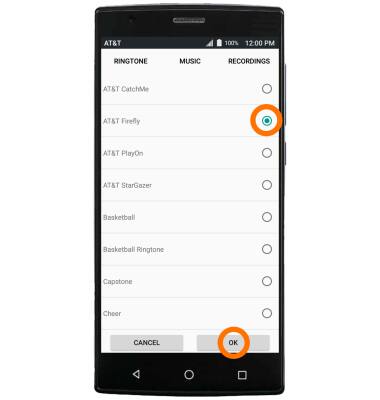
- Select the Desired ringtone, then select OK.
- When complete, select the Check icon to save the new contact.
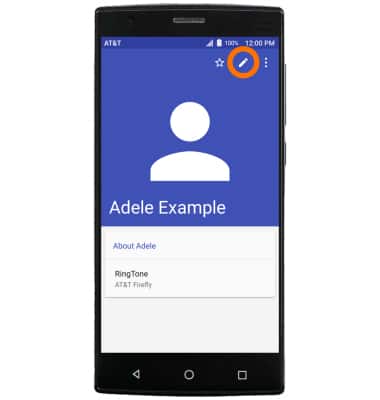
- To edit a contact, from the Contacts screen, select the Desired contact, then select the Edit icon.
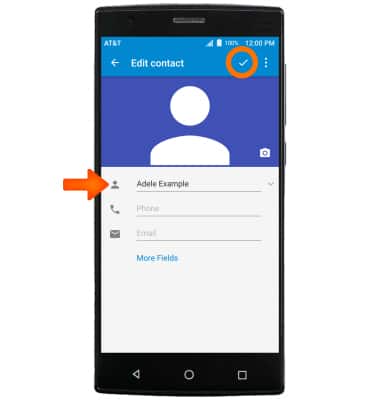
- Enter the Desired changes, then select the Check icon to save.
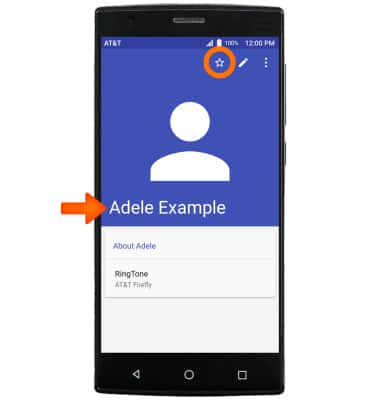
- To add a contact to favorites, from the Contacts screen, select the Desired contact, then select the Star icon.
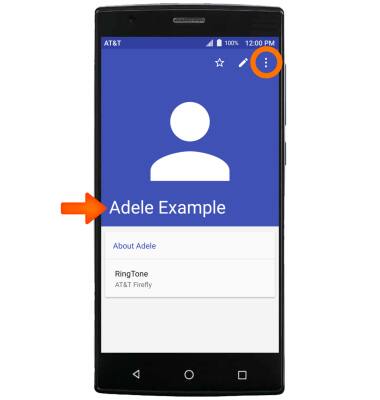
- To delete a contact, from the Contacts screen, select the Desired contact, then select the Menu icon.
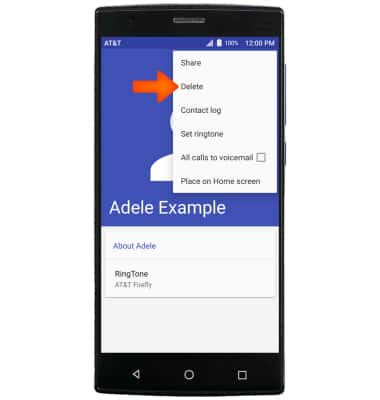
- Select Delete.
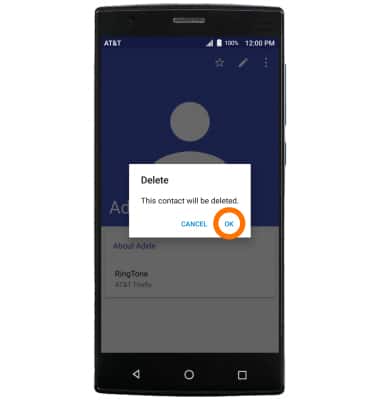
- Select OK.
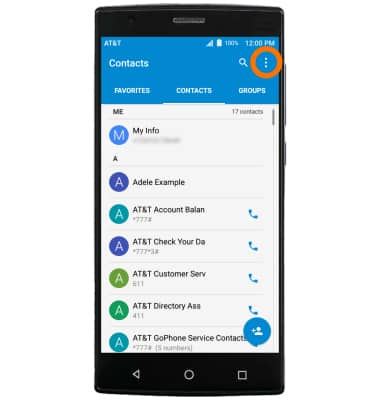
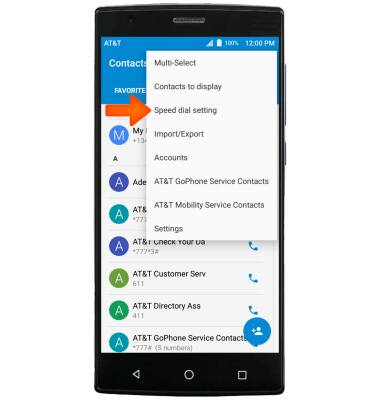
- To add a contact to speed dial, from the contacts screen, select the Menu icon.
- Select Speed dial setting.
- Select the Desired number then follow the prompts to add a speed dial contact.
Note: To back up contacts, from the Contacts screen, select the Menu icon > Import/Export > Export to Storage > OK.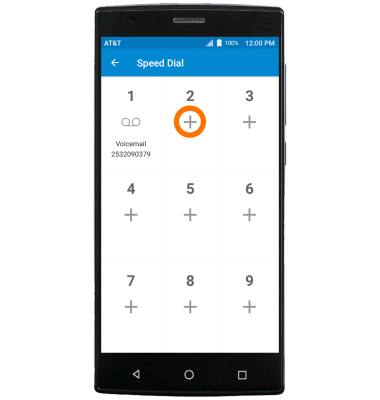
Contacts
ZTE ZMAX 2 (Z958)
Contacts
Add, view, delete, and customize contacts by adding a picture or ringtone.

0:00
INSTRUCTIONS & INFO
