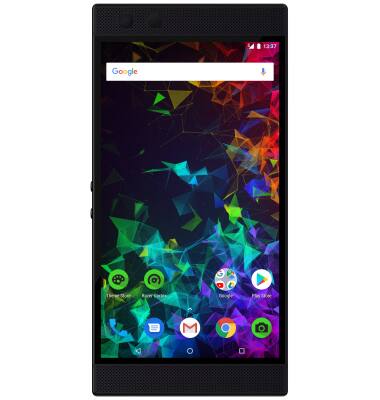
Device Setup
Which device do you want help with?
Device Setup
Set up your device for the first time or after having done a factory reset.
INSTRUCTIONS & INFO
Before setting up your device, make sure you have completed the online activation process. Please see Activate phone, SIM card, or other device for more information.
- To begin, select the desired language then select GET STARTED.
Note: The Razer Phone 2 comes with a Quick Start Guide, a USB charging block, and a USB-C cable.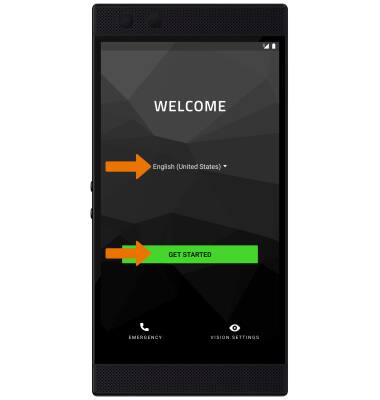
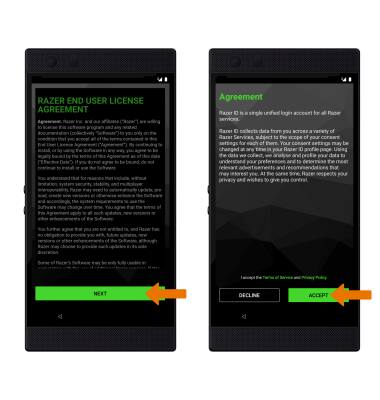
- Review the End User License Agreement, then select NEXT. Select ACCEPT to continue.
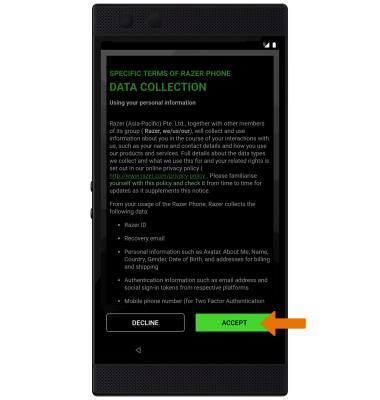
- Review the Data Collection prompt, then select ACCEPT.
- If you would like to connect to a Wi-Fi network, select the desired network name and follow the on-screen prompts. Select Use mobile network for setup to proceed without connecting to Wi-Fi.
Note: You will be prompted to select CONTINUE if you proceed without selecting a Wi-Fi network.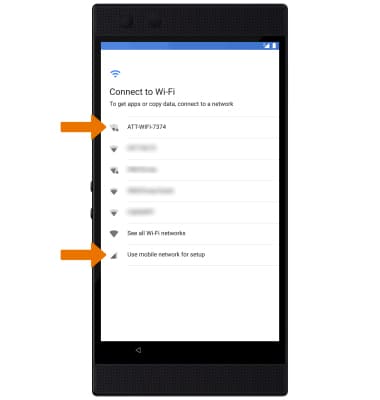
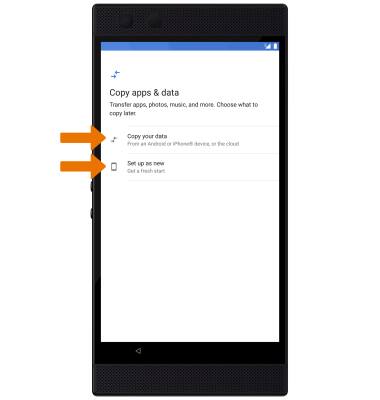
- If you would like to restore data from your old device to your new device, select Copy your data and follow the prompts. Select Set up as new to set up the device without restoring.
- If you would like to add your Google account, enter your Email or phone number then select Next. Enter your password, then select Next.
Note: You will be prompted to select Next again to confirm. If you do not sign in to a Google account, you will be prompted to enter a name for the device. Follow the prompts to continue.
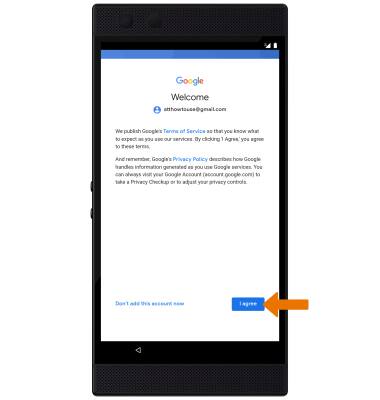
- Review Terms of Service, then select I agree.
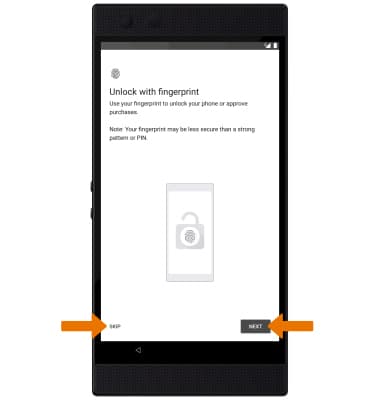
- If you would like to add a fingerprint to your device, select NEXT, then follow the prompts. If you would like to continue without adding a fingerprint, select SKIP.
- If you would like to add a passcode to your device, select the desired option then follow the prompts. If you would like to continue without adding a passcode, select Not now.
Note: If you select Not now, you will be prompted to select SKIP ANYWAY to confirm.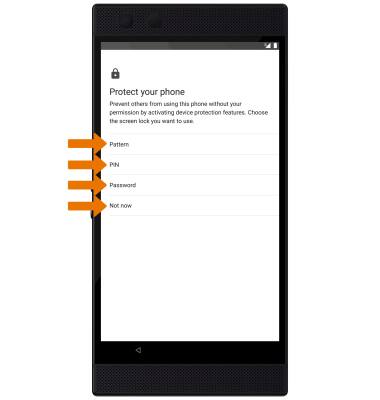
- Review the Access your Assistant with Voice Match prompt. Select NO THANKS to continue setting up the device. Select I AGREE and follow the prompts to set up Voice Match.
Note: You will only receive this screen if you added your Google account.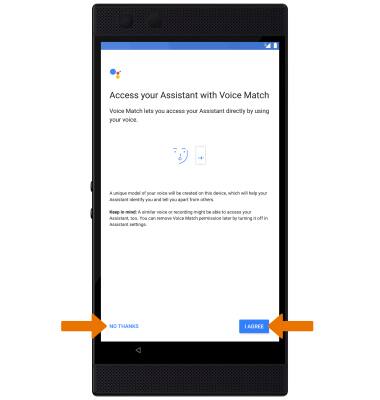
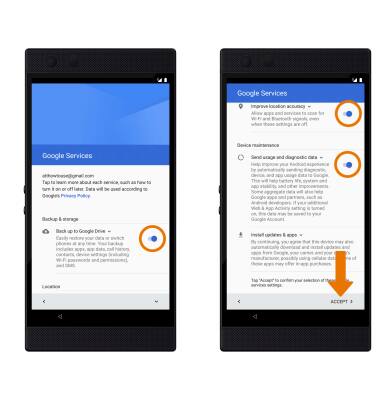
- Review the Google services prompt, then select the desired switches. Scroll to and select ACCEPT.
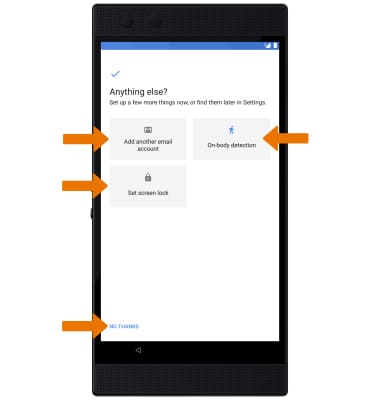
- If you would like to add another email account, add on-body detection, or set a screen lock select the desired option. Select NO THANKS to continue.
- If you would like to use a Razer ID, select the desired sign in option and follow the prompts. If you would like to continue without adding a Razer ID, select Skip.
Note: If you select Skip, you will be prompted to select MAYBE LATER to confirm.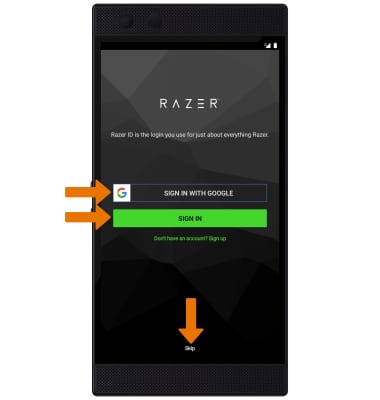
- Your device set up is complete.
