Calendar
Which device do you want help with?
Calendar
Access the calendar and manage events.
INSTRUCTIONS & INFO
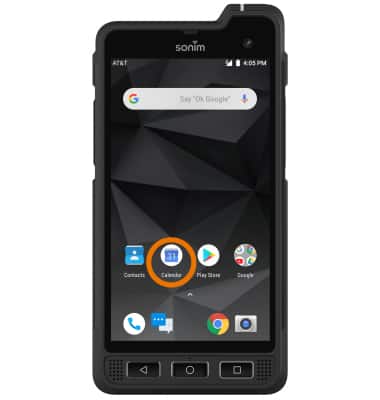
1. ACCESS CALENDAR: From the home screen, select the Calendar app.
Note: Swipe through the Calendar tutorial, then select Got it when finished. Sign in with your Google account to sync calendar events with your device.
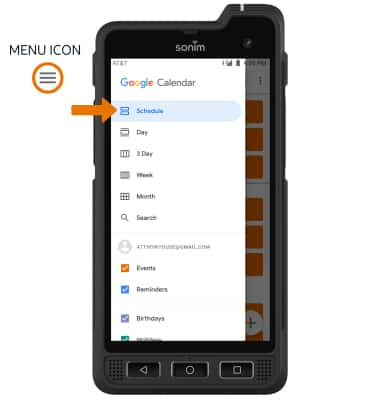
2. CHANGE CALENDAR VIEW: Select the Menu icon, then select the desired calendar view.
Note: For this demonstration, Schedule was chosen.
3. CREATE AN EVENT: Select the Add icon, then select the desired event type.
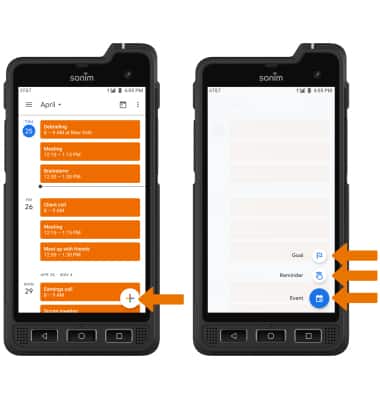
4. Enter Event details and Preferences as desired, then select Save.

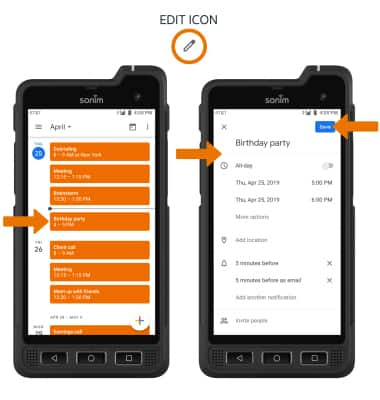
5. EDIT AN EVENT: Select the desired event > Edit icon > Edit event as desired > Save.
Note: You can only edit events that you created.
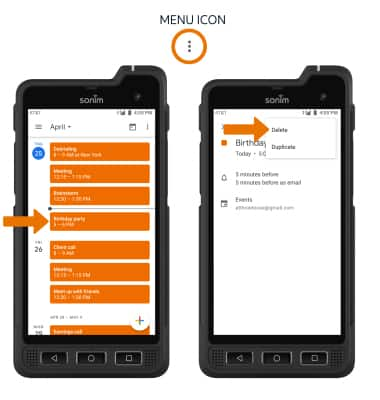
6. DELETE AN EVENT: Select the desired event > Menu icon > Delete.
Note: Select Delete again to confirm. If deleting a recurring event, select This event or This and following events as desired.
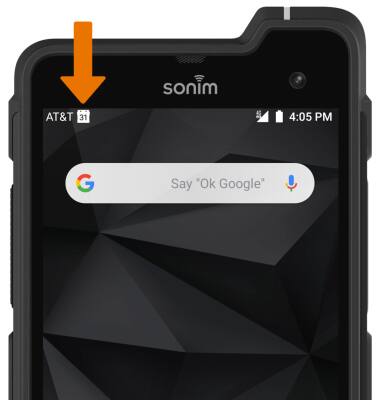
7. At the time of the event, an Event icon will be displayed in the Notification bar.
Note: Swipe through the Calendar tutorial, then select Got it when finished. Sign in with your Google account to sync calendar events with your device.
2. CHANGE CALENDAR VIEW: Select the Menu icon, then select the desired calendar view.
Note: For this demonstration, Schedule was chosen.
3. CREATE AN EVENT: Select the Add icon, then select the desired event type.
4. Enter Event details and Preferences as desired, then select Save.
5. EDIT AN EVENT: Select the desired event > Edit icon > Edit event as desired > Save.
Note: You can only edit events that you created.
6. DELETE AN EVENT: Select the desired event > Menu icon > Delete.
Note: Select Delete again to confirm. If deleting a recurring event, select This event or This and following events as desired.
7. At the time of the event, an Event icon will be displayed in the Notification bar.