")
2. Review the End-User-License Agreement, then select the Checkmark icon. Review the Confirm activation prompt, then select Yes.
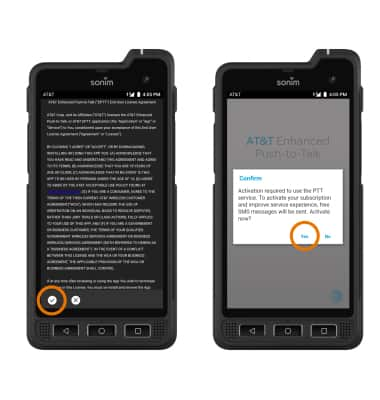
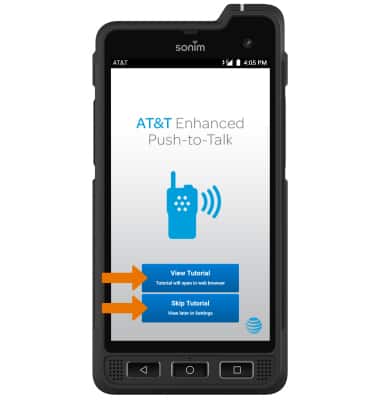
3. To view a tutorial on AT&T Enhanced Push-to-Talk, select View Tutorial. To continue to the app without viewing the tutorial, select Skip Tutorial.
Note: For this demonstration, Skip Tutorial was selected. The tutorial can be viewed later in AT&T Enhanced Push-to-Talk Settings. From the AT&T Enhanced Push-to-Talk app, select the Menu icon > Tutorial.
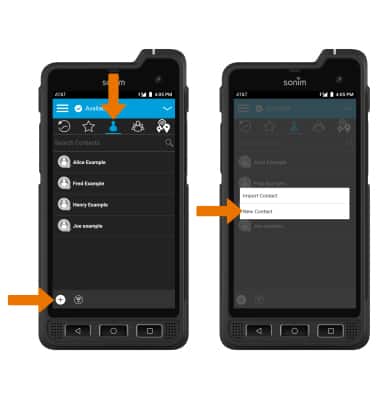
4. CREATE CONTACT: From the Contacts tab, select the Add icon then select New Contact.
Note: To import an already existing contact, select Import Contact then select the desired contact.
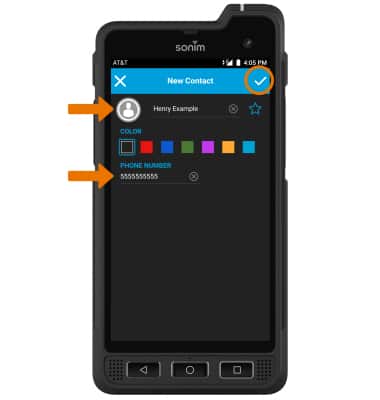
5. Enter the desired contact information, then select the Checkmark icon.
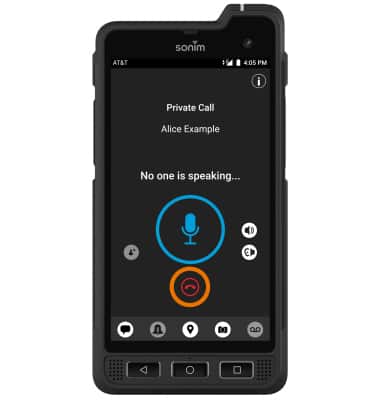
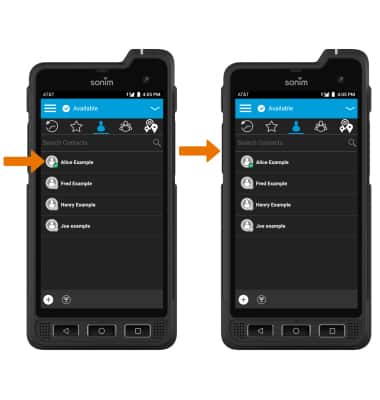
6. MAKE A CALL: From the Contacts tab, select the desired contact to call. Press the EPTT button and begin speaking to make a call.
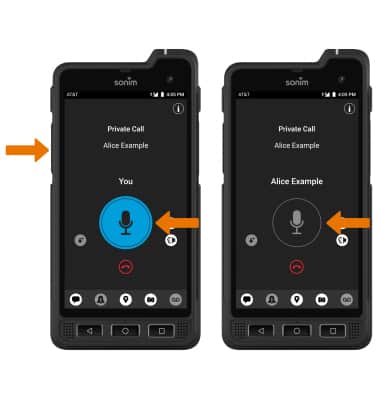
7. While on a call, press and hold the EPTT button while speaking to talk to the call recipient. The Microphone icon will be highlighted with a blue background. When the Call recipient is talking the Microphone icon will turn gray.
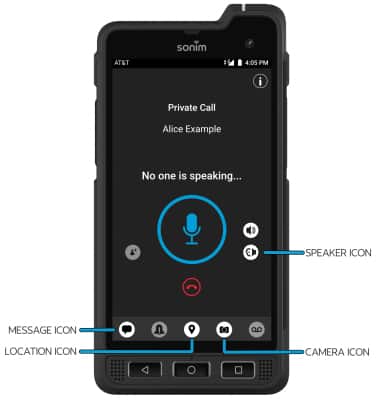
8. IN-CALL OPTIONS: Select the desired option.
9. END CALL: Select the End call icon to end the call.