Send & Receive Messages
Create and respond to text (SMS) or picture (MMS) messages, add, save, and view received attachments and more.
In this tutorial, you will learn how to:
• Access messaging
• Compose a message
• Reply or react to a message
• Delete a message or thread
Access messaging
From the clock screen, press the Digital Crown/Home button, then select the ![]() Messages app.
Messages app.
Compose a message
1. Select ![]() Compose icon.
Compose icon.
2. Select the Add Contact field. Select the ![]() Microphone icon to dictate the desired contact. Select the
Microphone icon to dictate the desired contact. Select the ![]() Add contact icon to choose a contact from the contacts list. Select the
Add contact icon to choose a contact from the contacts list. Select the ![]() Keypad icon to enter the desired phone number.
Keypad icon to enter the desired phone number. 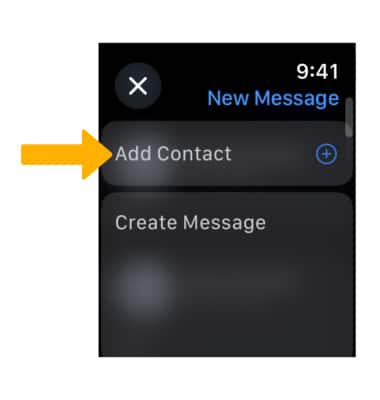
3. From the New Message screen, select the Create Message field.
Note: To edit the available auto response options, see the Messaging Settings tutorial.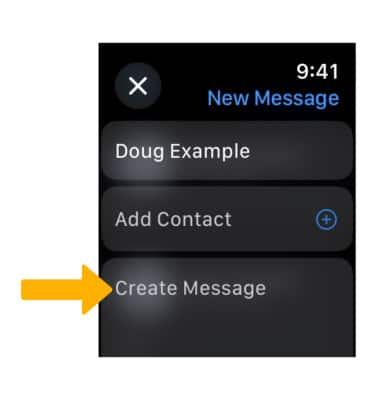
4. Select the App Store icon to send Gifs, Voice messages, and Digital touch messages.
Note: To send a photo message, from the clock screen, press the Digital Crown/Home button then select the ![]() Photos app > desired photo >
Photos app > desired photo > ![]() Share icon >
Share icon > ![]() Message icon then follow the prompts.
Message icon then follow the prompts.
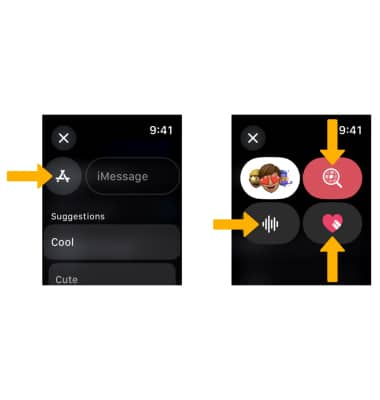
5. From the Create Message screen, scroll to and select the desired auto response option or select iMessage to send a custom response. Select the Emoji icon to send emojis. Select the Microphone icon to dictate messages. Type out your desired message, then select Done.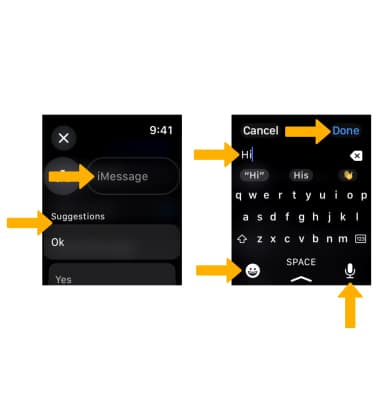
6. When finished, scroll to and select Send.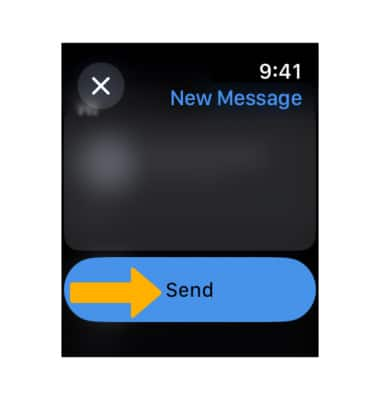
Reply or react to a message
To reply to a message, from the desired message thread scroll to and select the desired text input option then follow the prompts to send your reply. 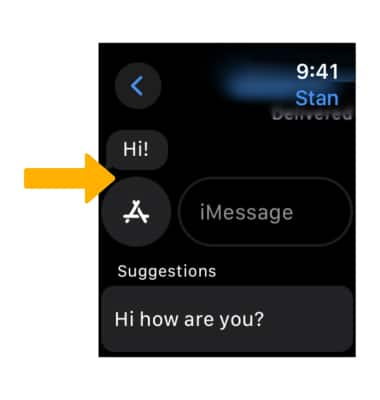
To react to a message, select and hold the desired message then select the desired reaction. 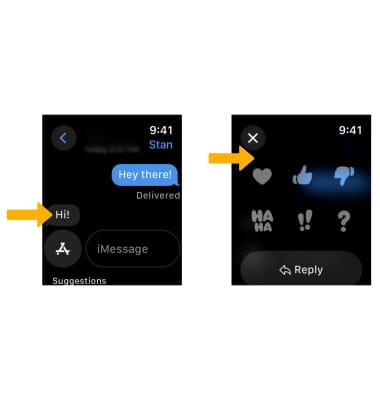
Delete a text message thread
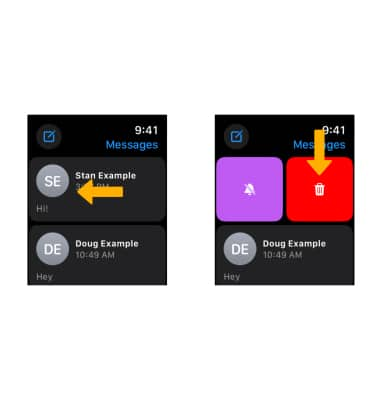
From the messages screen, select and drag the desired message thread to the left then select the Delete icon. 