1. To start pairing, place the Watch near an Android phone with Bluetooth enabled. From the paired device, navigate to and select the  Watch app. Select Continue to set up your new watch.
Note: To pair with the Google Pixel Watch, your phone should be on Android OS 8 or later.
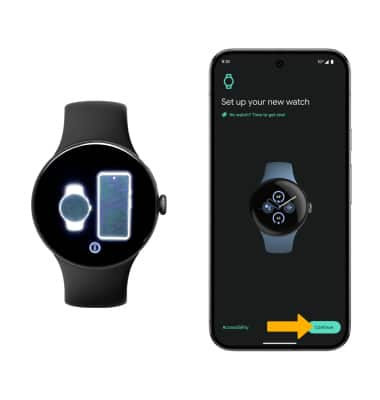
 Watch app. Select Continue to set up your new watch.
Note: To pair with the Google Pixel Watch, your phone should be on Android OS 8 or later.

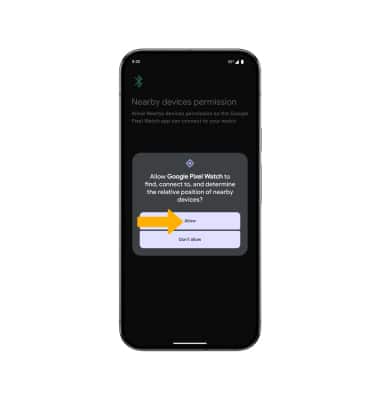
2. Review the Nearby devices permission prompt, then select Allow.
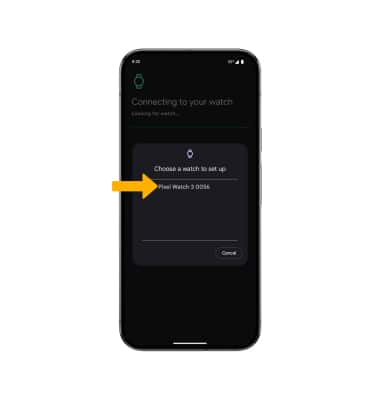
3. Select the desired watch.
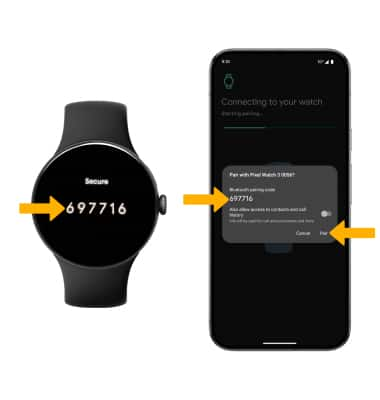
4. Verify that the code on the smart phone you want to connect matches the code on the watch, then select Pair.
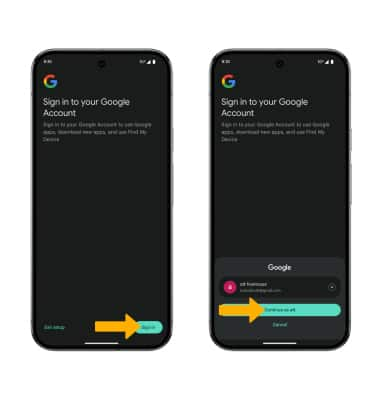
5. If a Google account is set up on your phone, you will be prompted to link your account to your watch. Select Sign in, then select Continue as.
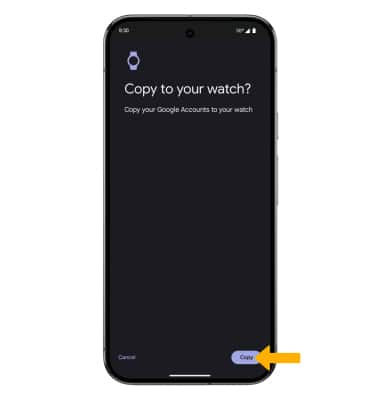
6. Review the Copy to your watch prompt, then select the desired option.
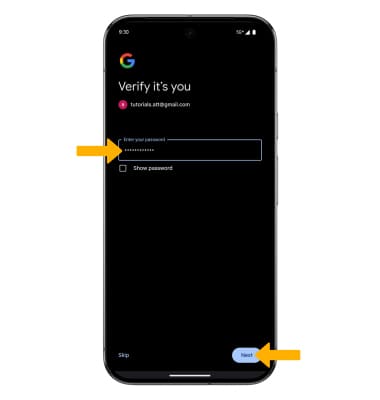
7. Enter your Google account password, then select Next. Select Skip to continue without logging into your Google account.
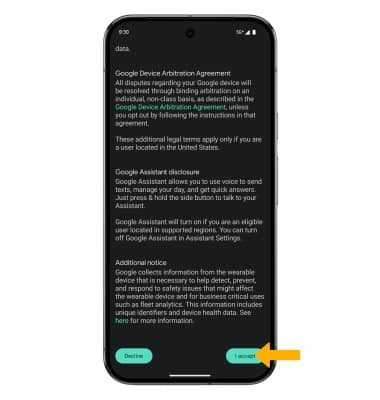
8. Review the Google Terms of service prompt, then scroll to and select I accept.
9. Select Next to learn how to attach and remove watch bands.
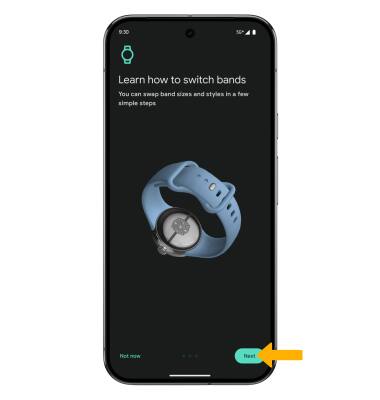
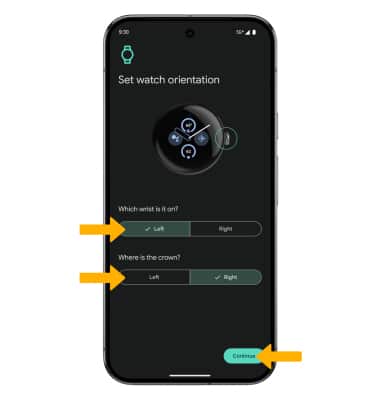
10. Set the Watch orientation as desired, then select Continue.
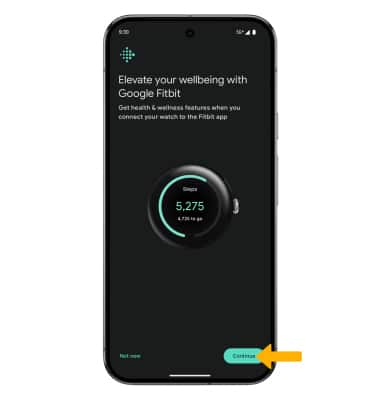
11. To use your Fitbit account on the watch, select Continue then follow the prompts.
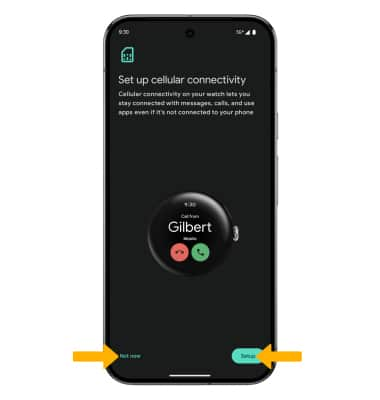
12. To set up Cellular Service and activate NumberSync, select Setup and follow the prompts. To continue without setting up cellular service, select Not now.
Note: If you do not already have a watch plan, you'll be prompted to enter or create your AT&T user ID and password . Once logged in, you'll view watch plan details and finalize your plan purchase.
image
13. Review the Google Pixel Watch safety features prompt, then scroll to and select Continue.
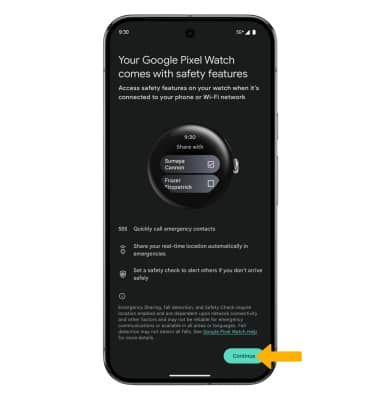
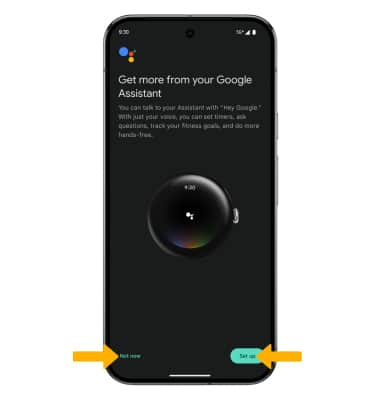
14. Review the Get more from your Google Assistant prompt, then select the desired option.
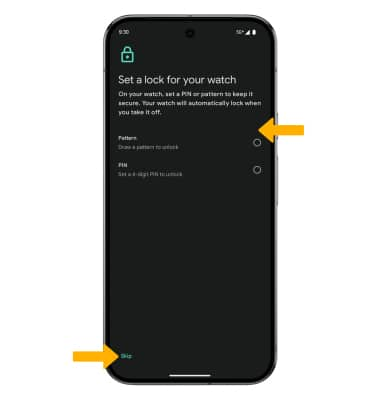
15. Select the desired screen lock type to set up a screen lock on your watch, then follow the prompts. Select Skip to continue without setting up a screen lock.

4. Verify that the code on the smart phone you want to connect matches the code on the watch, then select Pair.

5. If a Google account is set up on your phone, you will be prompted to link your account to your watch. Select Sign in, then select Continue as.

6. Review the Copy to your watch prompt, then select the desired option.

7. Enter your Google account password, then select Next. Select Skip to continue without logging into your Google account.

8. Review the Google Terms of service prompt, then scroll to and select I accept.

9. Select Next to learn how to attach and remove watch bands.

10. Set the Watch orientation as desired, then select Continue.

11. To use your Fitbit account on the watch, select Continue then follow the prompts.

12. To set up Cellular Service and activate NumberSync, select Setup and follow the prompts. To continue without setting up cellular service, select Not now.
Note: If you do not already have a watch plan, you'll be prompted to enter or create your AT&T user ID and password . Once logged in, you'll view watch plan details and finalize your plan purchase.
image

13. Review the Google Pixel Watch safety features prompt, then scroll to and select Continue.

14. Review the Get more from your Google Assistant prompt, then select the desired option.

15. Select the desired screen lock type to set up a screen lock on your watch, then follow the prompts. Select Skip to continue without setting up a screen lock.
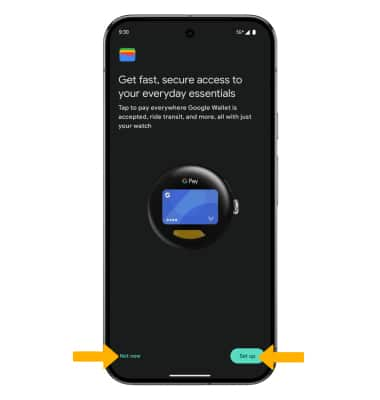
16. To set up Google Wallet, select Set up. Select Not now to proceed without setting up Google Wallet.
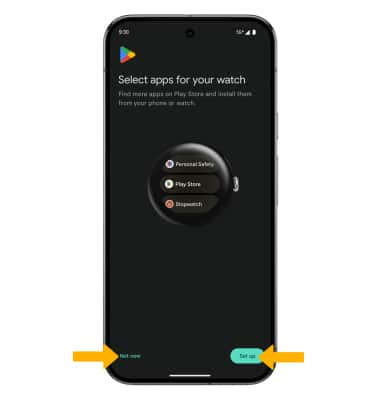
17. Review the Select apps for your watch prompt, then select the desired option.
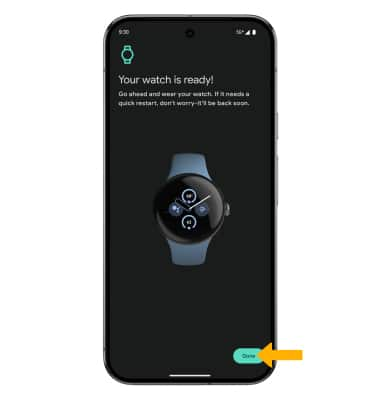
18. Set up is now complete. Select Done.
Note: After set up is complete, ensure that the software is up to date.


 Play Store > search for and select Google Pixel Watch app > select Install > Open.