Take a Screenshot
Learn how to take and access screenshots.
In this tutorial, you will learn how to:
• Take a screenshot
• Edit or share screenshots immediately
• Access and use screen recording
• Access and use Three finger screenshot
• Access and use Auto Blur
Take a screenshot
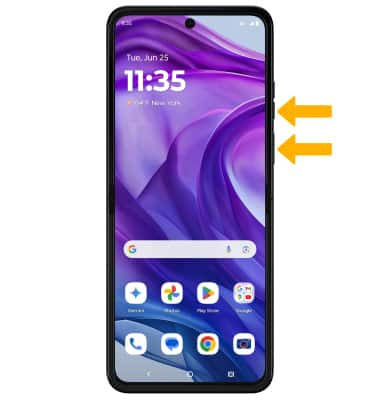
Press and hold the Side button and Volume down buttons simultaneously.
Note: To access screenshots, from the home screen, select the  Photos app > Library tab > Screenshots.
Edit or share screenshots immediately
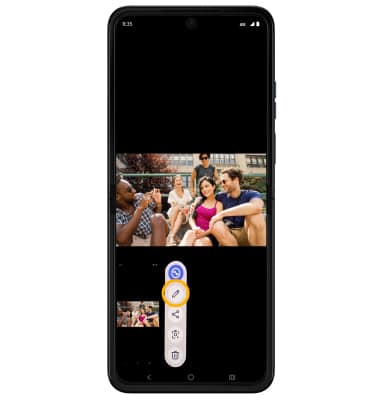
Immediately after taking a screenshot, a notification will appear on the screen. Select the desired option:
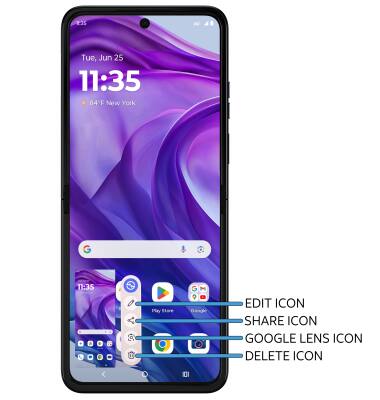
• EDIT A SCREENSHOT: Select the Edit icon, then edit screenshot as desired.
• SHARE A SCREENSHOT: Select the Share icon, then follow the prompts to share.
• USE GOOGLE LENS: Select the Google Lens icon, then follow the prompts.
• DELETE A SCREENSHOT: Select the Delete icon, then select OK to confirm.
Access and use screen recording
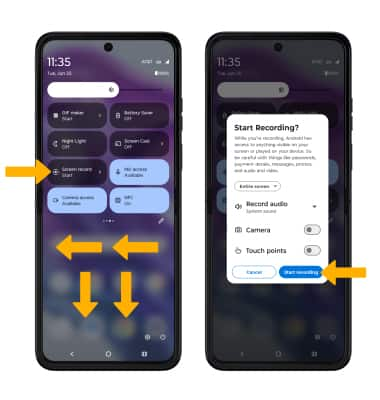
Screen recording lets you capture what’s happening on your phone. Swipe down from the Notification bar with two fingers, then swipe left twice. Select the Screen record icon, then select Start recording.
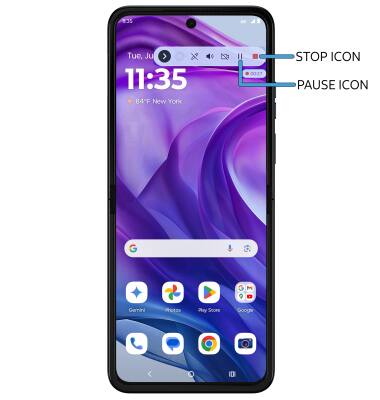
To pause the recording, select the Pause icon. To stop the recording, select the Stop icon.
Note: To access screen recordings, from the home screen, select the  Photos app > Library tab > Screenrecord.
Access and use Three finger screenshot
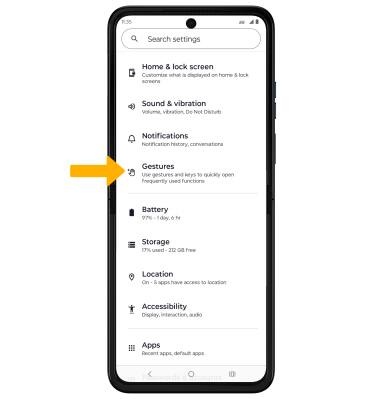
1. Swipe down from the Notification bar with two fingers, then select the Settings icon. Scroll to and select Gestures.
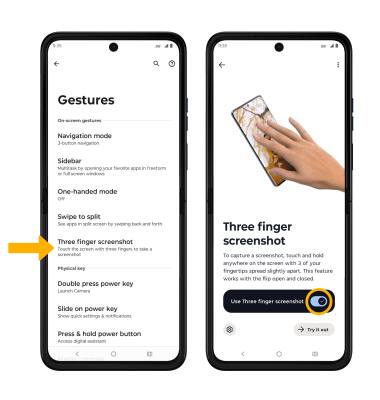
2. Select Three finger screenshot then select the Use Three finger screenshot switch to turn it on or off.
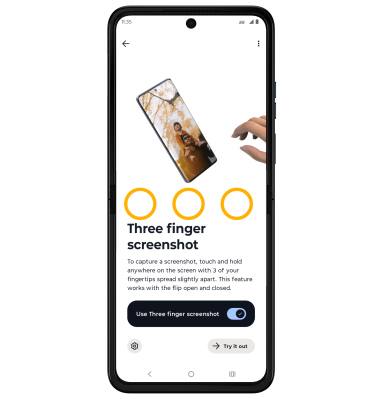
3. To take a screenshot using Three finger screenshot, select and hold anywhere on the screen with three fingertips slightly spread apart.
Access and use Auto Blur
1. Keep your identity private by instantly blurring sensitive content in screenshots, such as your name and image. It works with all your favorite social apps, including Facebook, TikTok, What’s App, and more. To access Auto Blur, after taking a screenshot, select the Edit icon.
2. To use Auto Blur, select the Auto Blur icon. Draw over the desired faces or information you wish to blur.
