In this tutorial, you will learn how to:
• Send a message with the AT&T amiGO™ app
• Pair a device
• Access messages
• Compose and send a message
• Read and respond to a new message
• Delete a message
When a new message is received, the ![]() New Message icon will display in the Notification bar.
New Message icon will display in the Notification bar.
Send a message with the AT&T amiGO™ app
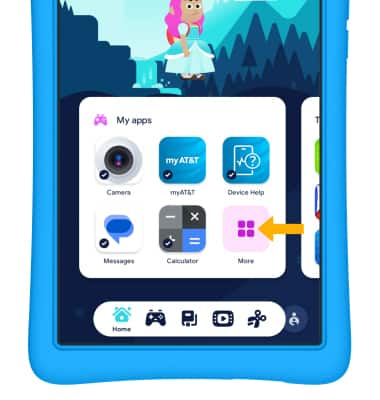
1. From the home screen, select More on the My apps widget then navigate to and select the  AT&T amiGO™ app.
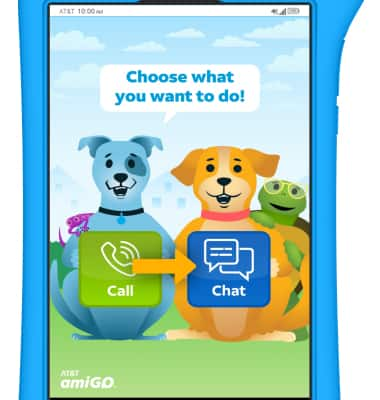
2. From the AT&T amiGO™ app on your tablet, select Chat.
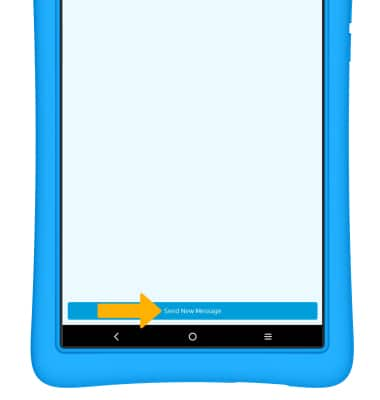
3. Select Send New Message.
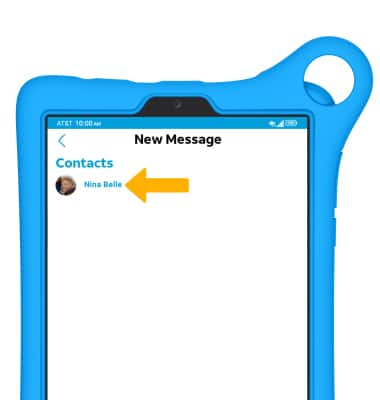
4. Select the desired contact.
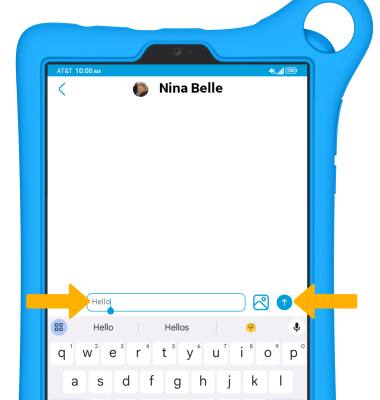
5. Enter the desired message, then select the Send icon.
Pair a device
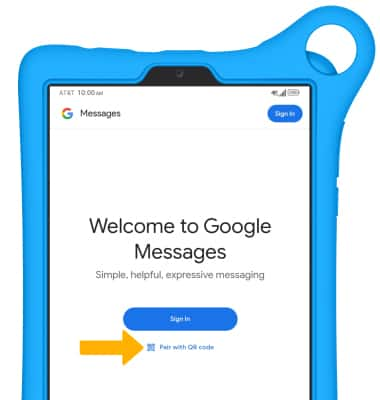
To use Google Messages from your AT&T amiGO Jr. Tab™, you must pair the Google Messages app with your Phone. From the home screen, select the  Messages app. Select Pair with QR code.
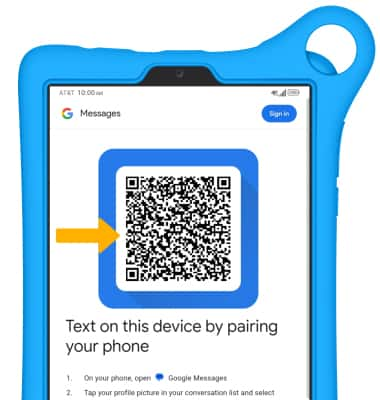
A QR code will be displayed.
Note: From your Google Messages app on your Phone, select the ![]() Account icon, then select Device pairing. Select Switch to QR pairing, then select QR code scanner. Use your camera to scan the QR code displayed on your AT&T amiGO Jr. Tab™. Alternately, to pair your device using your Google account, select Sign in on your AT&T amiGO Jr. Tab™ and follow the prompts.
Account icon, then select Device pairing. Select Switch to QR pairing, then select QR code scanner. Use your camera to scan the QR code displayed on your AT&T amiGO Jr. Tab™. Alternately, to pair your device using your Google account, select Sign in on your AT&T amiGO Jr. Tab™ and follow the prompts.
Access messages
1. From the home screen, select the  Messages app.
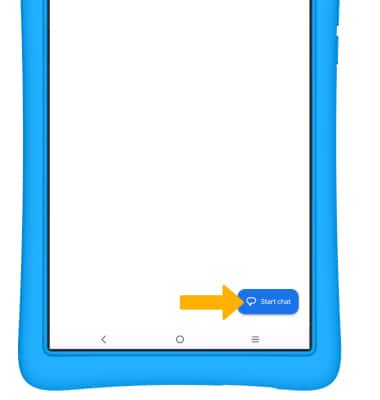
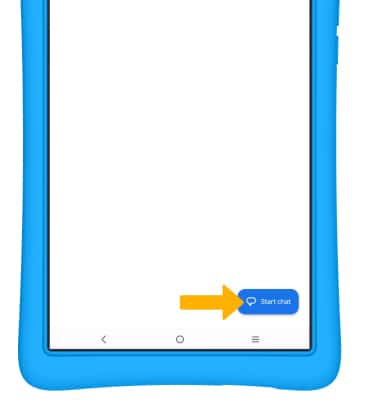
2. Select Start chat.
3. Enter the desired number or select the desired contact.
Compose and send a message
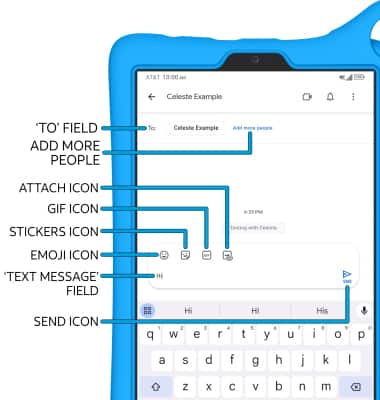
• ENTER MESSAGE: Select the 'Text message' field to enter the desired message.
• ADD ATTACHMENT: Select the Attach icon to send a picture or to add an attachment.
• SEND AN EMOJI: Select the Emoji icon.
• SEND STICKER: Select the Sticker icon.
• SEND A MESSAGE: When finished composing a message, select the Send icon to send the message.
Read and respond to a new message
From the Messaging inbox, select the desired message thread.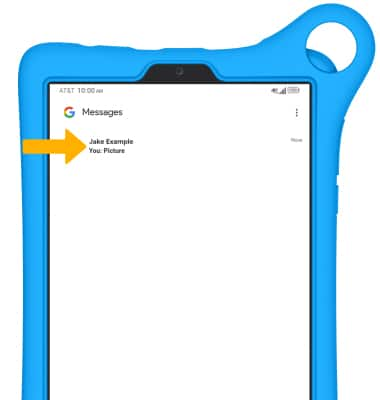
VIEW AN ATTACHMENT: To view an attachment, select the desired attachment.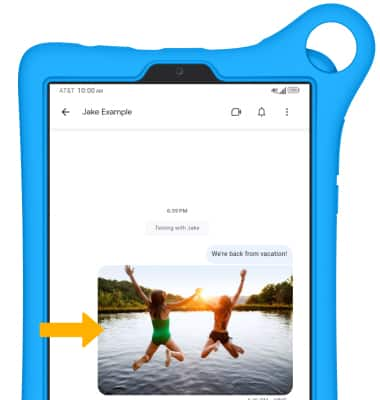
SAVE AN ATTACHMENT: To save an attachment, select and hold the desired attachment then select the Download icon.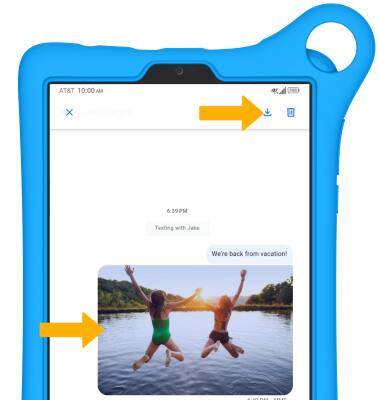
RESPOND TO A MESSAGE: Enter the desired message in the 'Text message' field, then select the Send icon.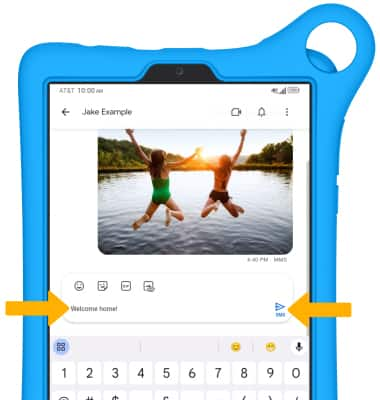
Delete a message
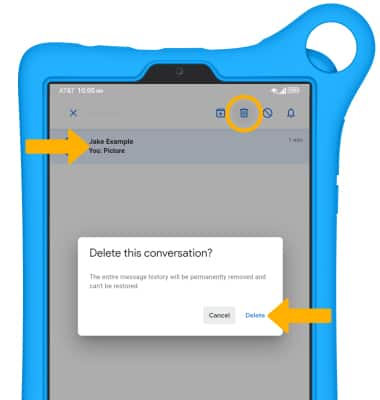
From the desired message thread, select and hold the desired message then select the Delete icon. Select Delete again to confirm.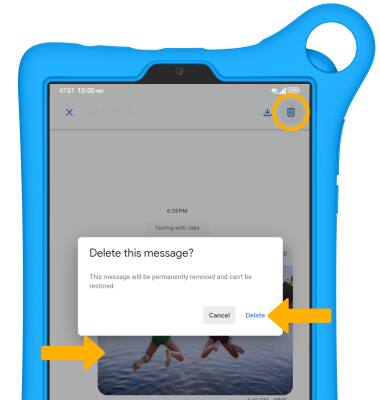
DELETE MESSAGE THREAD: From the Messages screen, select and hold the desired message thread then select the Delete icon. Select Delete again to confirm.
