Advanced Photo & Video Features
Learn how to access and use Camera modes, effects, customization, and crop a photo.
In this tutorial, you will learn how to:
• Access camera modes
• Customize photo and video settings
• Crop a photo
• Access camera filters
• Add a watermark
• Access and use Keep last mode
Access camera modes
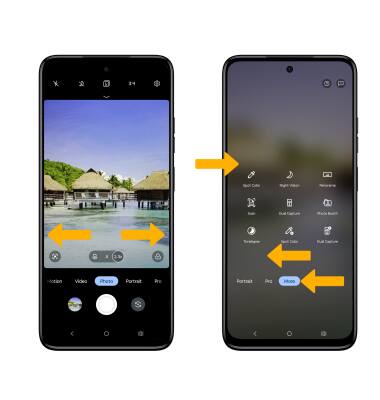
From the Camera app, swipe left or right to access Portrait or Pro. Swipe left to More to access modes such as Spot Color, Panorama, and Timelapse.
Note: Portrait allows you to highlight the subject of a photo by blurring the background. Pro allows you to take photos in manual mode. Spot Color allows you to select a color to highlight. Panorama allows you to create wider photos by stitching together multiple photos. Timelapse allows you to create time-lapse videos. Not all of these options are available when using the front facing camera.
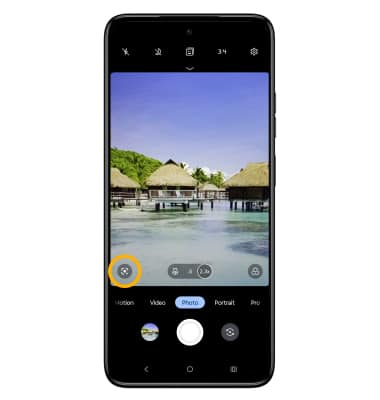
To access Google Lens, select the Google Lens icon then follow the prompts to use.
Customize photo and video settings
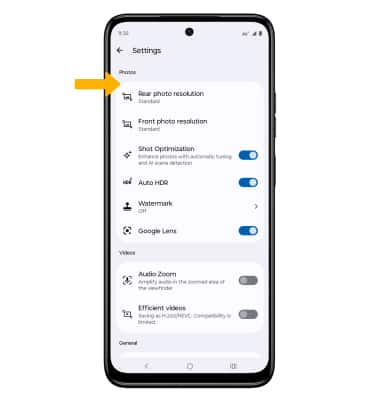
From the Camera app, select the ![]() Settings icon. Adjust settings as desired.
Settings icon. Adjust settings as desired.
Crop a photo
1. From the Camera app, select the Gallery icon. Swipe left to the desired photo, then select Edit.
Note: Alternately, from the home screen, select the  Photos app > navigate to and select the desired photo.
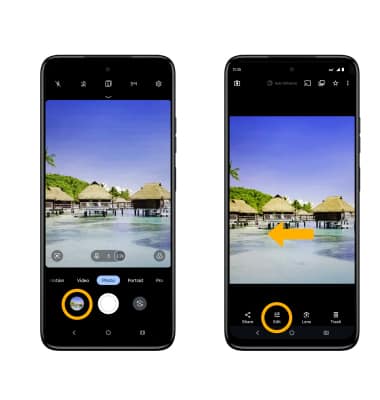
2. Select Crop. Select and drag the crop corners to crop as desired, then select Save.
Access camera filters
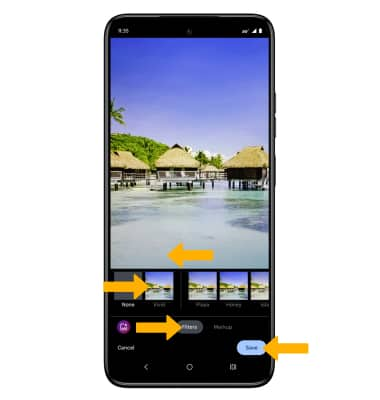
From the Edit screen, swipe left to Filters. Select the desired filter, then select Save.
Add a watermark
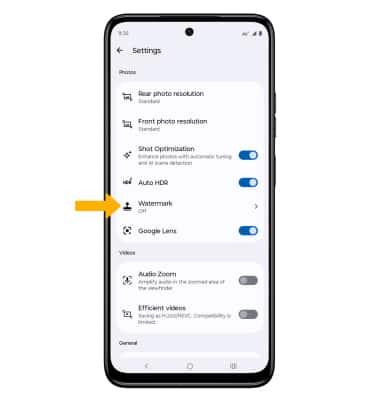
1. From Camera settings screen, select Watermark.
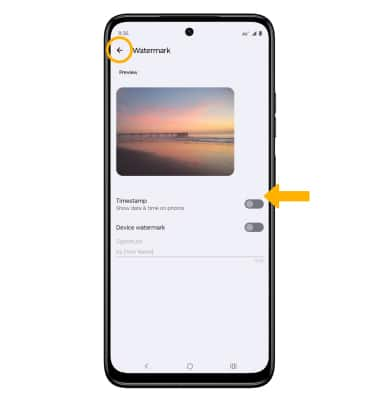
2. Select the switch next to the desired watermark option. When finished, select the back arrow.
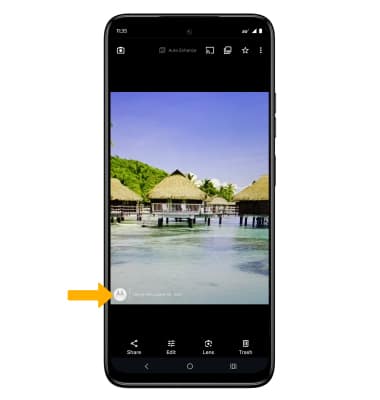
3. After taking a photo, the watermark will appear on the bottom left corner of your photo.
Access and use Keep last mode
Keep last mode preserves the last used camera settings when reopening the camera app. From Camera settings screen, scroll and select the Keep last mode switch.
