In this tutorial, you will learn how to:
• Access and edit notifications and Quick Settings
• Access additional apps
• Enable/disable gestures
• Access Moto Actions
• Access and edit navigation bar settings
• Use Full screen gestures
• Enable Sidebar
• Enable and use Swipe to split
• Enable and use Three finger screenshot
• Access and edit Physical Key settings
• Enable Fast flashlight
• Enable and use Quick Launch
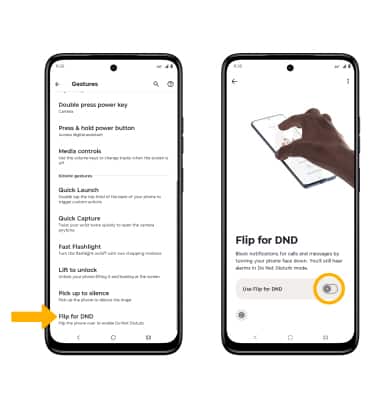
• Enable Flip for DND
Access and edit notifications and Quick Settings
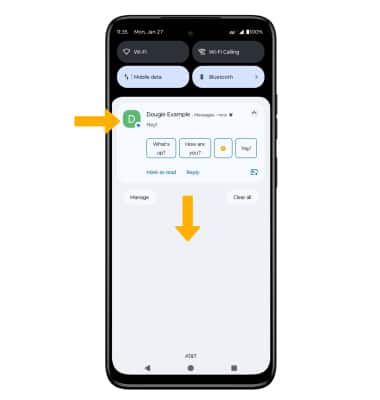
ACCESS: Swipe down from the Notification bar to access Quick Settings. Notifications will be displayed beneath Quick Settings.
Note: You can access Expanded Quick Settings by swiping down twice from the Notification bar.
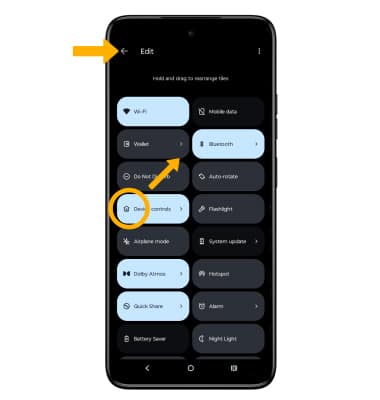
EDIT APPEARANCE: Swipe down from the Notification bar with two fingers to access Expanded Quick Settings, then select the ![]() Edit icon. Select and drag the desired icon to the desired location, then select the Back arrow when finished.
Edit icon. Select and drag the desired icon to the desired location, then select the Back arrow when finished.
Access additional apps
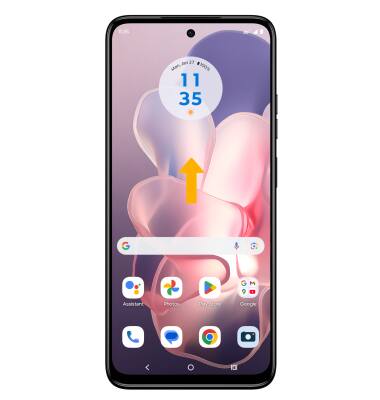
Swipe up from the home screen to access the Apps tray.
Enable/disable gestures
1. Swipe down from the Notification bar with two fingers, then select the ![]() Settings icon.
Settings icon.
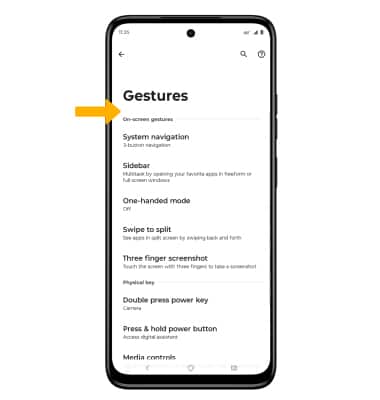
2. Scroll to and select Gestures.

3. Select the desired option to enable or disable the desired gesture.
Access Moto Actions
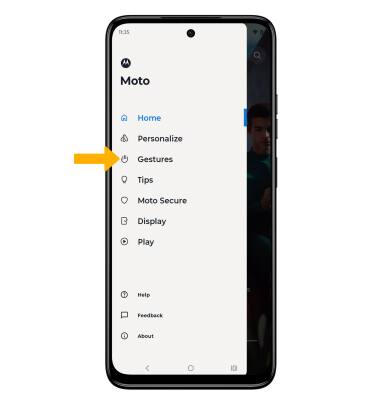
1. From the home screen, swipe up to access the Apps tray then navigate to the Moto folder and select the  Moto app.
2. Select the  Menu icon, then select Gestures.
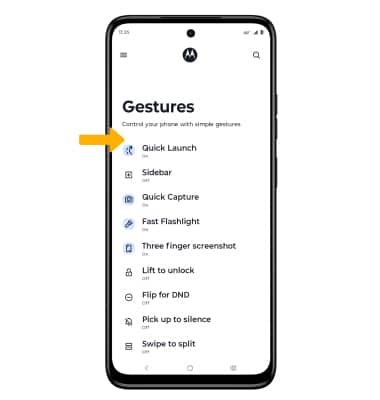
3. Select the desired feature, then select the switch to enable or disable.
Access and edit navigation bar settings
ACCESS: To change how you interact with the Navigation bar, swipe down from the Notification bar with two fingers then select the ![]() Settings icon. Select Gestures, then select System navigation.
Settings icon. Select Gestures, then select System navigation.
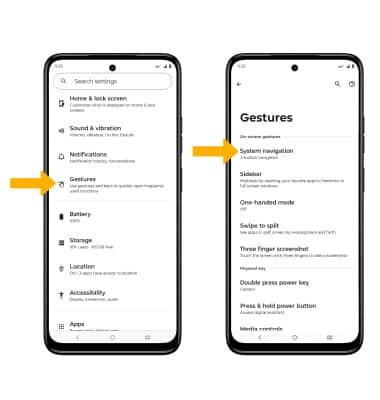
EDIT: From the Navigation bar screen, select the desired option.
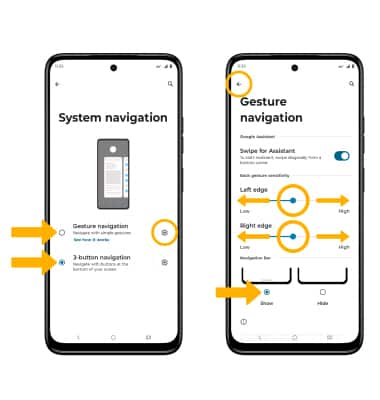
• GESTURES: Select Gesture navigation to enable a gesture-based navigation bar.
• NAVIGATION BUTTONS: Select 3-button navigation to enable a button-based navigation bar.
• CHANGE GESTURE SENSITIVITY: Select the ![]() Settings icon next to Gesture navigation, then select and drag the desired Back Sensitivity slider to the desired location. Select to Show or Hide to show or hide the navigation bar. Select the back arrow when finished.
Settings icon next to Gesture navigation, then select and drag the desired Back Sensitivity slider to the desired location. Select to Show or Hide to show or hide the navigation bar. Select the back arrow when finished.
Note: For more information about how to use Full screen gestures, select See how it works.
Use Full screen gestures
Enabling Full screen gestures allows you to swipe from different areas of the screen to go backwards, forwards, return to the home screen, and view your open apps.
NAVIGATE HOME: Swipe up from the bottom edge of the screen.
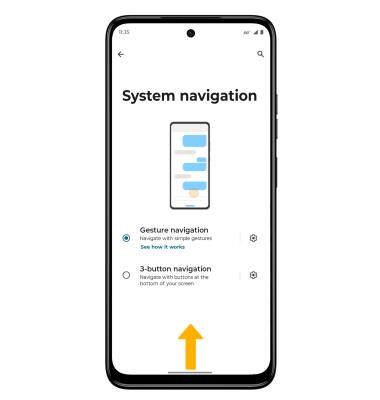
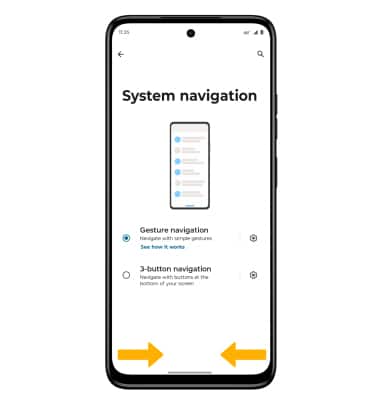
GO BACK: Swipe in towards the middle of the screen from the left or right edge of the screen.
VIEW RECENT APPS: Swipe up from the bottom of the screen and continue to hold your finger on the screen.
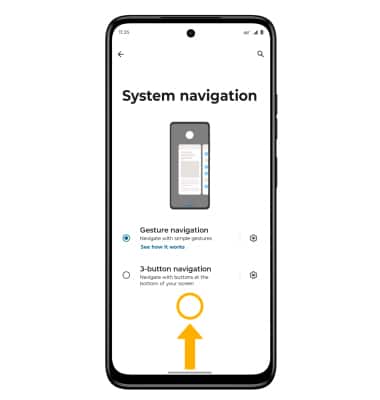
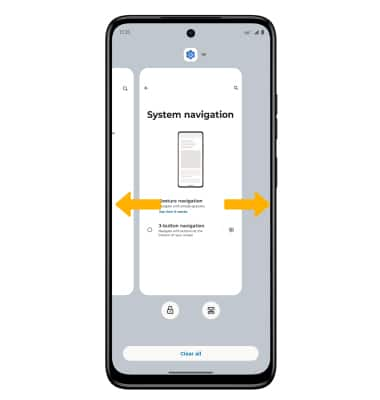
SWITCH BETWEEN APPS: Swipe left or right.
Enable Sidebar
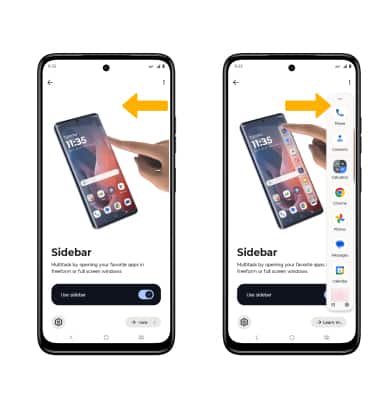
1. From the Gestures screen, select Sidebar. Select the Sidebar switch.

2. To use Sidebar, swipe your finger to the left from the edge of the screen to open the Sidebar. Select the desired app.
Enable and use Swipe to split
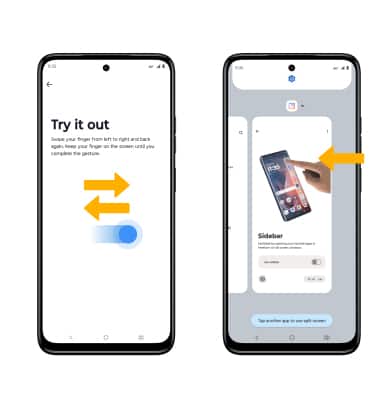
Swipe to split uses a simple gesture to activate split screen. From the Gestures screen, select Swipe to split. Select the Use Swipe to split switch.
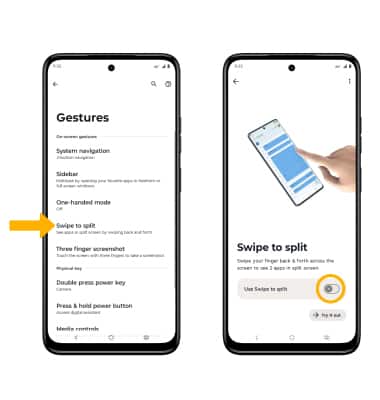
To use Swipe to split, swipe your finger back and forth across the screen once to enable Split Screen. Select the desired app to display on the bottom half of the screen.
Note: For further instruction on how to use Split Screen, view the Split Screen tutorial.
Enable and use Three finger screenshot
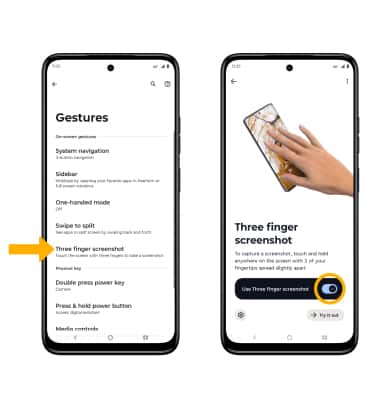
From the Gestures screen, select Three finger screenshot, then select the Use Three finger screenshot switch.
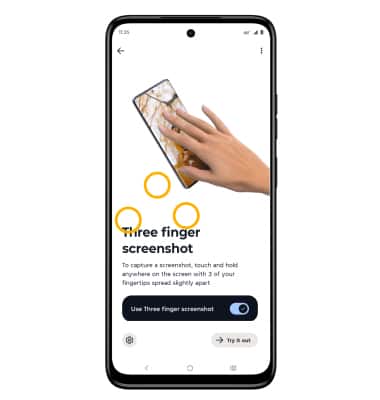
To take a screen shot using Three finger screenshot, select and hold anywhere on the screen with three finger tips slightly spread apart.
Access and edit Physical Key settings
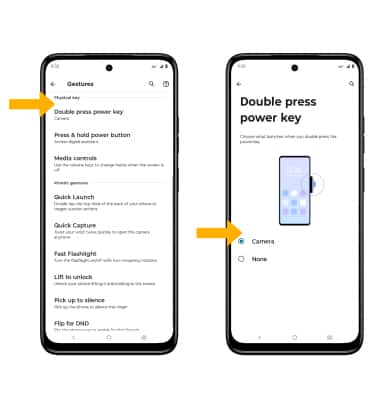
From the Gestures screen, scroll to and select the desired option under Physical key, then select the desired option to enable or disable the desired gesture.
Enable Fast flashlight
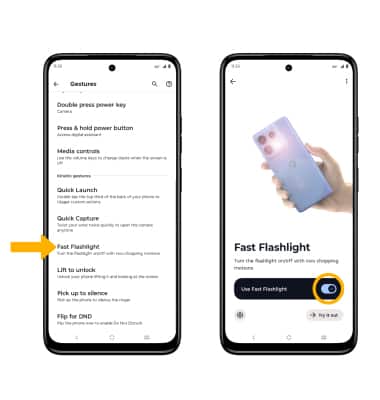
From the Gestures screen, scroll to and select Fast flashlight, then select the Use Fast flashlight switch.
Note: When Fast flashlight is enabled, you can quickly turn the flashlight on or off by moving your device in two chopping motions.
Enable and use Quick Launch
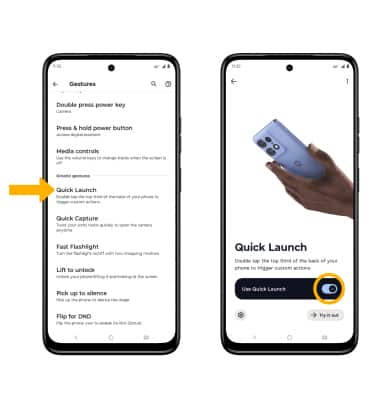
Quick Launch enables you to double tap the back to trigger custom actions. From the Gestures screen, scroll to and select Quick Launch, then select the Use Quick Launch switch.
Note: To change the custom action, from the Quick Launch screen, select Settings then select the desired settings.
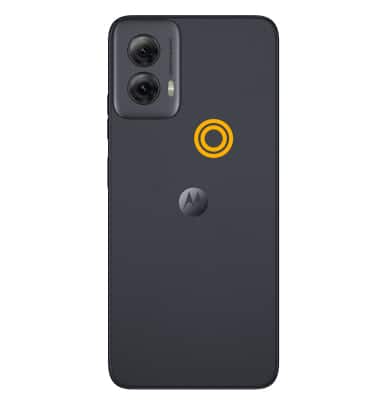
To use Quick Launch, double tap the back of the device.
Enable Flip for DND
From the Gestures screen, scroll to and select Flip for DND, then select the Use Flip for DND switch.
