In this tutorial, you'll learn how to:
• Set up an upgrade device
• Set up a new line during device setup
• Set up a line after device setup
• Manage cellular plans (for devices with multiple lines of service)
• Switch cellular plan for a phone call (for devices with multiple lines of service)
• Switch cellular plan for a message (for devices with multiple lines of service)
• Silence an eSIM
• Delete an eSIM
If you're trying to find the EID for your associated eSIM, go to the Find IMEI, Serial number, & EID tutorial.
Set up an upgrade device
2. Swipe up from the "Hello" screen.
Note: If you're blind or have low vision, you can turn on VoiceOver or Zoom from the Hello screen. To find your IMEI and EID, select the

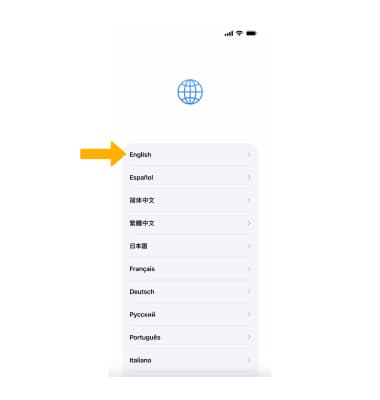
3. Select your language.

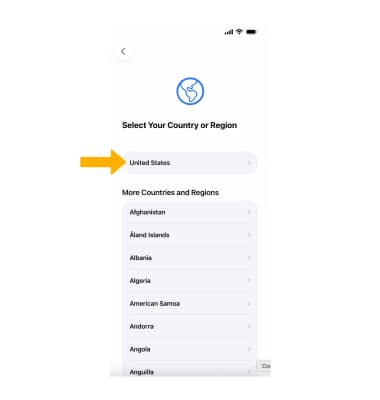
4. Select your country or region.
Note: Keep in mind, this affects how information will look on your device, including date, time, contacts, and more.

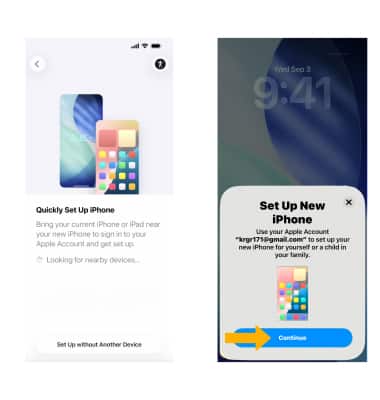
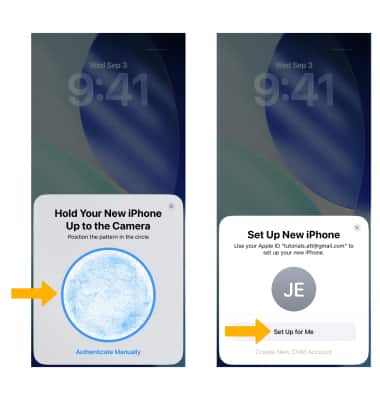
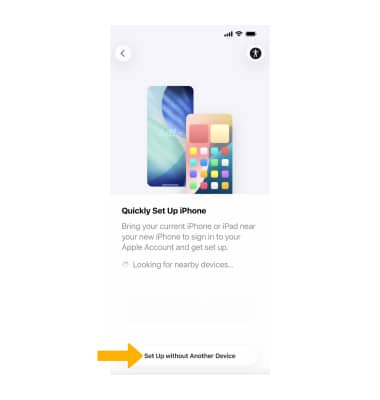
6. Use Quick Start to transfer data and content from an old device to your new one during set up. To set up your device with Quick Start, bring your current iPhone close to your new iPhone. When the Set Up New iPhone prompt appears on your current iPhone, select Continue.
Note: If you don't want to transfer content from an old device, select Set Up Manually.
7. Place the picture of your new iPhone's screen within the frame that opens on your current iPhone. On your current iPhone, select Set Up for Me.
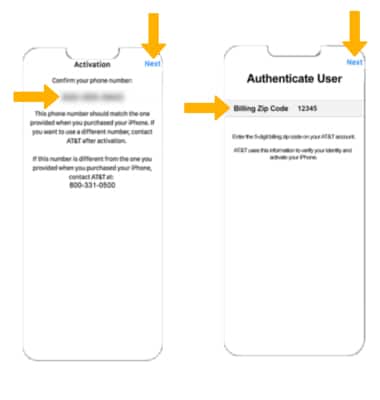
8. Confirm your phone number after completing the Quick Start process. If the correct phone number displays, select Next. You'll then be asked to confirm your Zip Code.
-
- If you bought your new device from AT&T, you may enter the ZIP Code that your device was shipped to or the billing ZIP Code associated with your account.
- If you bought your device from Apple, you must enter the billing ZIP Code associated with your account.
Note: This phone number should match the one provided when you purchased your iPhone. If not, please contact AT&T immediately.
9. Follow the prompts to continue setting up your device.
Set up a new line during device setup
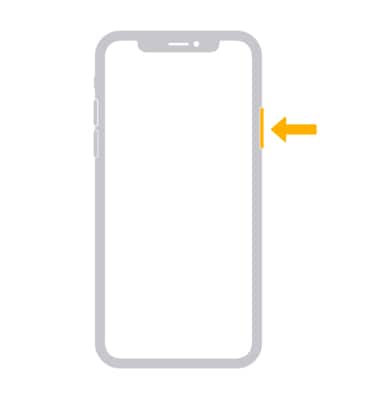
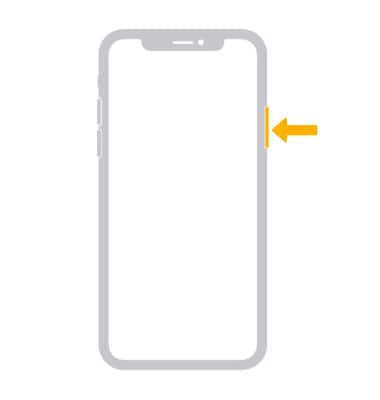
1. Turn your iPhone on by pressing and holding the Side button until the Apple logo displays.
2. Swipe up from the "Hello" screen.
Note: If you're blind or have low vision, you can turn on VoiceOver or Zoom from the Hello screen. To find your IMEI/MEID and ICCID, select

3. Select your language.
4. Select your country or region.
Note: Keep in mind, this affects how information will look on your device, including date, time, contacts, and more.
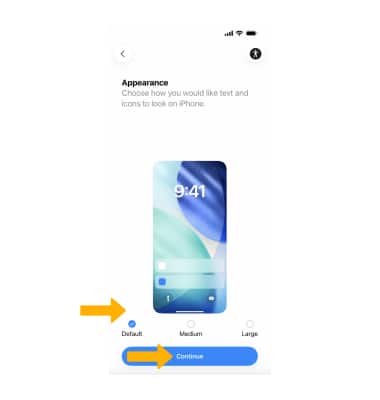
5. Edit the Appearance as desired, then select Continue.

Note: Quick Start is a feature that allows you to transfer data and content from an old device to your new one during set up. On your old device select Continue > hold up your new iPhone to the camera of the old phone > enter the old device's passcode on your new device.
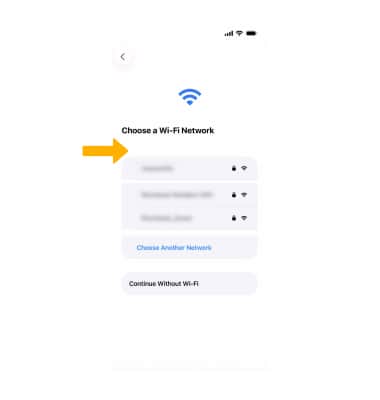
7. Select the desired Wi-Fi network then follow the prompts to connect.
Note: Get help activating AT&T cell service or if you can't connect to Wi-Fi.
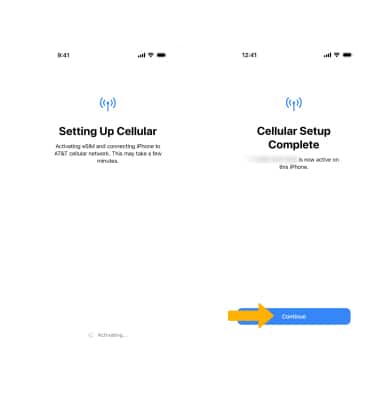
8. Your device will automatically attempt to download the eSIM and connect to the AT&T cellular network. Select Continue. When you receive a prompt saying your device is activated, select Done.
9. Follow the prompts to continue setting up your device.
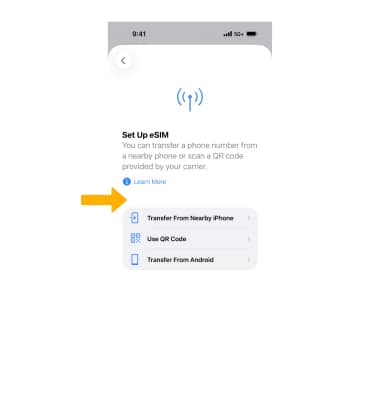
Download eSIM after device setup
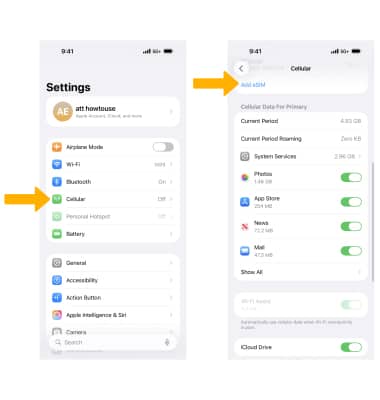
Manage multiple lines on one device
To switch between lines of service, from the Cellular screen, select the desired plan. Edit the Line's settings as desired.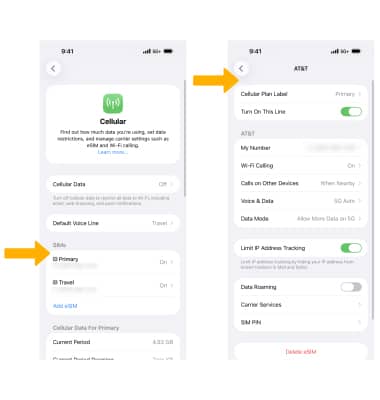
Switch line for phone call
From the Keypad in the ![]() Phone app, select the current line, then select the desired line.
Phone app, select the current line, then select the desired line.
Note: Keep in mind, while on the current line, incoming calls to the other line will route straight to voicemail.
Switch line for message
1. When composing a message in the ![]() Messages app, select the current line, then select the desired line.
Messages app, select the current line, then select the desired line.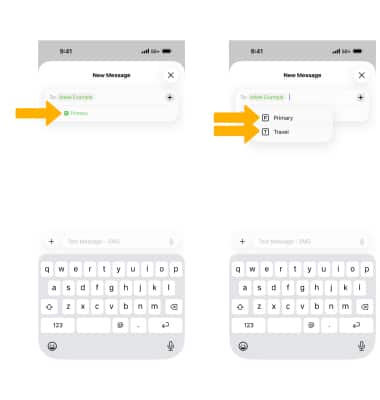
Silence an eSIM
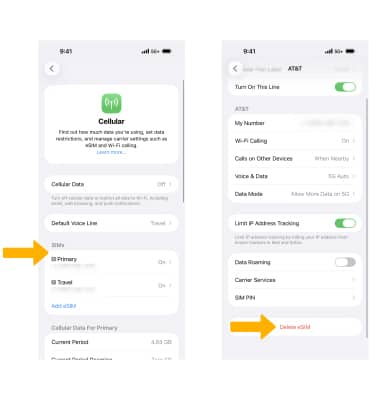
From the Cellular menu in Settings, choose the line of service you want to delete then select the Turn On This Line switch.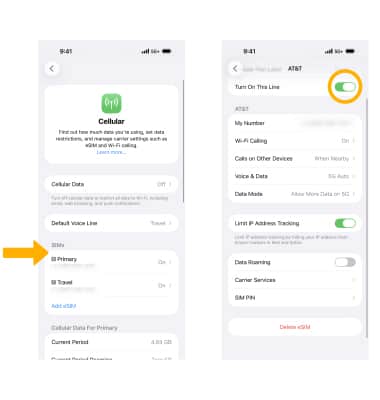
Delete an eSIM
Once an eSIM is deleted, you'll lose your connection to the AT&T cellular network for this line of service on the device. From the Cellular menu in Settings, choose the line of service you want to delete. Select Delete eSIM.
Note: You'll be prompted to select Delete eSIM to confirm.