In this tutorial, you will learn how to:
• Determine Apple Pencil Compatibility
• Connect Apple Pencil
• Use Apple Pencil
• Use Scribble
• Access Apple Pencil settings
• Charge Apple Pencil
Determine Apple Pencil Compatibility
Apple Pencil 1st Generation is compatible with:
• iPad 6th, 7th, 8th, 9th and 10th generation
• iPad Air 3rd generation
• iPad mini 5th generation
• iPad Pro 12.9-inch 2nd generation
• iPad Pro 10.5-inch
Apple Pencil 2nd generation is compatible with:
• iPad Pro 12.9-inch 3rd, 4th, 5th, and 6th generation
• iPad Pro 11-inch 1st, 2nd, 3rd, and 4th generation
• iPad Air 4th and 5th generation
• iPad mini 6th generation
Note: This list covers all iPads that are compatible with iPadOS 26. For help determining your iPad's model, visit Identify your iPad model.

Connect Apple Pencil
1. Apple Pencil requires a Bluetooth connection in order to be used and charged. To enable Bluetooth, swipe down from the top right edge of the screen to access the Control Center, then select the Cellular icon. Select Bluetooth.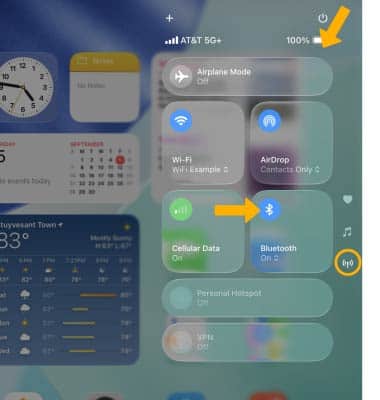
2. If your iPad uses Apple Pencil 2nd generation, magnetically attach your Apple Pencil to the side of your device. If your iPad uses Apple Pencil 1st generation, attach your Apple Pencil's lightning connector to your iPad.
Note: When connecting for the first time, a Welcome prompt will appear. Select Continue > Done. iPad 10th Generation requires a USB-C to Apple Pencil Adaptor to be attached to the USB-C port.
Use Apple Pencil
1. Apple Pencil allows you to mark up notes, screenshots, and more. To write notes, from the home screen, select the ![]() Notes app.
Notes app.
2. Select the ![]() Compose icon.
Compose icon.
3. Write or draw your desired note. To access Apple Pencil modes, select the Markup icon.
Note: The more pressure that is applied, the darker and thicker the pen strokes will be. The less pressure that is applied, the lighter and thinner the pen strokes will be. With Apple Pencil 2nd generation you can switch modes by double tapping the Apple Pencil.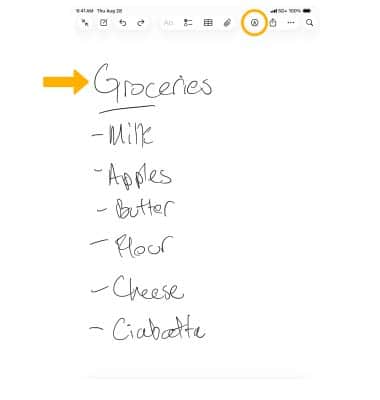
4. Select the desired mode. 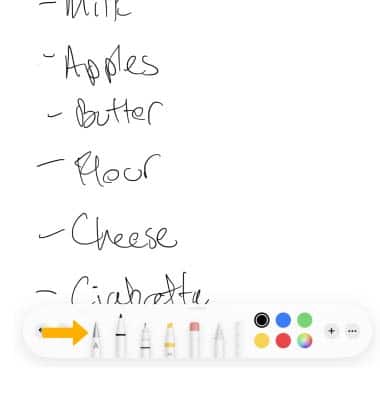
5. To mark up screenshots or photos, from the home screen, select the ![]() Photos app.
Photos app.
6. Navigate to and select the desired photo, then select the Edit icon. 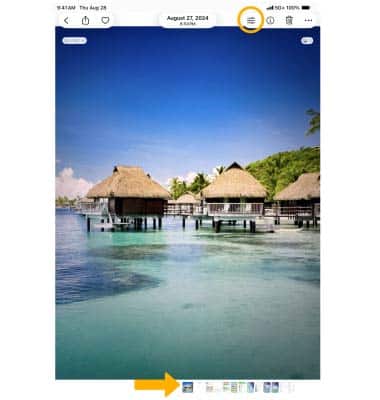
7. Select the Markup icon. 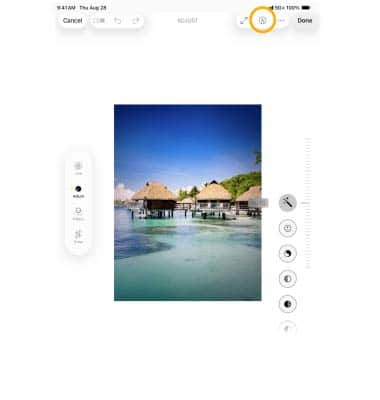
8. Write or draw your desired note. When finished, select Checkmark icon.
Note: Select Done again to save all changes. 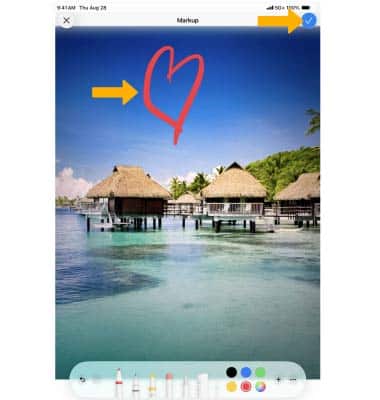
Use Scribble
1. Scribble allows you to write by hand in any text field across iPadOS, scratch to delete, circle a word to select it easily, and more. To enable Scribble, select the ![]() Settings app. Scroll to and select Apple Pencil, then select select the
Settings app. Scroll to and select Apple Pencil, then select select the ![]() Scribble switch.
Scribble switch.
Note: To view a Scribble tutorial, select Try Scribble. The Double Tap section will only appear in Apple Pencil's settings with Apple Pencil 2nd Generation.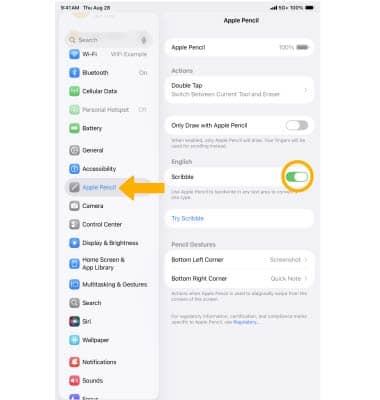
2. From any text field, use the Apple pencil to write the desired text.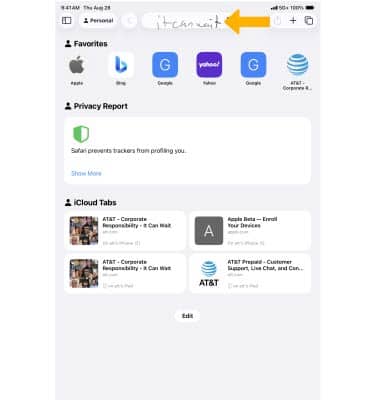
3. The handwriting will automatically convert to text.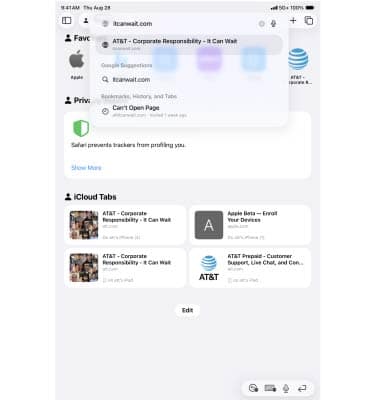
4. To delete text, scratch out the desired text. 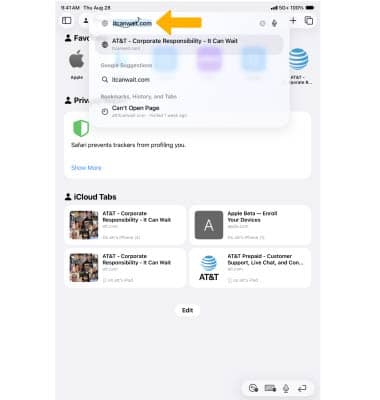
5. To insert or remove a space between words, draw a line between the words. 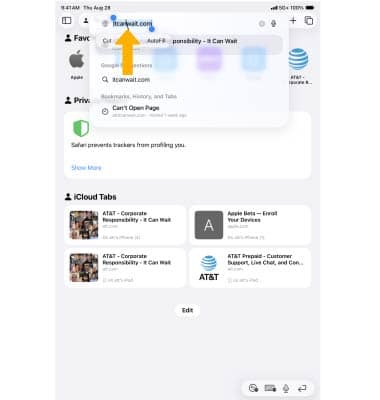
6. To select a word, draw a circle or draw a line through the text. 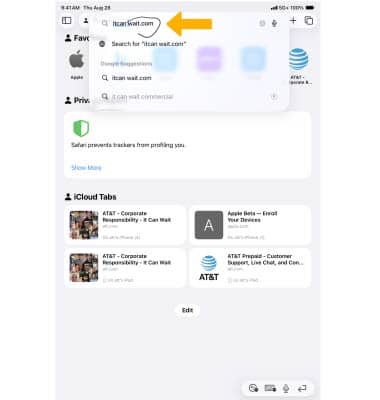
Access Apple Pencil settings
1. From the home screen, select the ![]() Settings app.
Settings app.
2. Scroll to and select Apple Pencil, then adjust settings as desired.
Note: The Double Tap section will only appear in Apple Pencil's settings with Apple Pencil 2nd Generation.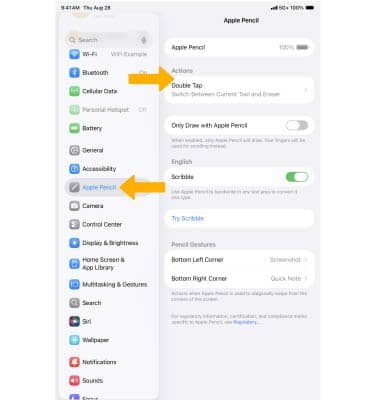
Charge Apple Pencil
If your iPad uses Apple Pencil 2nd generation, magnetically attach your Apple Pencil to the right side of your device. If your iPad uses Apple Pencil 1st generation, plug the lightning connector of the Apple Pencil into your iPad. The Apple Pencil will begin to charge.
Note: To view the Apple Pencil's battery percentage, select the ![]() Settings App > Apple Pencil. When the pencil is charging, the
Settings App > Apple Pencil. When the pencil is charging, the ![]() Charging icon will appear at the top of the Apple Pencil screen. iPad 10th Generation requires a USB-C to Apple Pencil Adaptor to be attached to the USB-C port.
Charging icon will appear at the top of the Apple Pencil screen. iPad 10th Generation requires a USB-C to Apple Pencil Adaptor to be attached to the USB-C port.
