")

In this tutorial, you will learn how to:
• Access App Updater
• Access and Use Contact Transfer
• Use Kiosk Mode
Access App Updater
App updater allows you to install and update applications with ease.
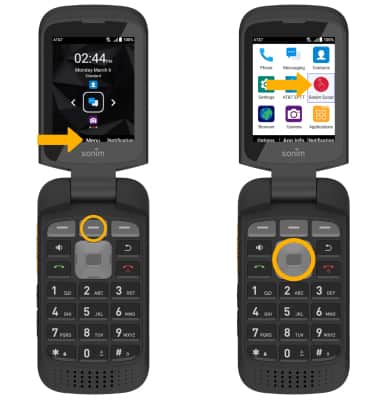
1. From the device home screen, press the center dynamic key to view the Menu. Using the directional keys, navigate to and highlight Sonim Scout, then press the Select key.
Note: If this is your first time accessing Sonim Scout, accept the agreements.
2. From the Setup tab, use the directional keys to highlight App Updater and press the Select key. Press the Select key to Check for Updates.

Access and Use Contact Transfer
With Sonim Scout, you can upload a custom contact list to your device for Voice Calling and Text Messaging.
1. From your browser, go to sonimcloud.com. Enter your Email and Password then click SIGN IN.
Note: If you do not have a Sonim Cloud account, you can click SIGN UP and follow the prompts to set up your account.

2. From the Dashboard, click RESOURCES, then click the Add icon under CONTACTS.

3. To create a contact list, click Click here at the bottom of the page to download Sonim Cloud's template. Enter the contact information in the corresponding fields, then save the template.

4. Enter the Name. Click Choose File to upload your Contacts List, then click ADD.

5. To transfer the contact list to the device, from the Sonim Cloud website, click DEVICES. Click the Edit icon under the desired device.

6. Scroll down to the Utilities menu. Click the Contacts drop-down menu, then click the desired contact list. Scroll down and click Update when finished.

7. To transfer the contact list to a group of devices, click Device Group.

8. Click the Edit icon under the desired group, then scroll down to the Utilities menu.

9. Click the Contacts drop-down menu, then click the desired contact list.

10. Scroll down and click Update. The contact list will wireless sync over the air.

Use Kiosk Mode
Remove distracting applications and features simply with a Sonim Kiosk. Kiosk allows you to focus on your end users and the apps they need to get the job done effectively and efficiently.
1. To create a Kiosk Profile, from the Sonim Cloud dashboard click RESOURCES. Click the Add icon under KIOSK.

2. Enter the desired Name, then click the Mode drop-down menu to select Work Mode. Click the Device Model drop-down menu, then select Sonim XP3plus.

3. Select the Allowed Applications using the Shift and/or Control keys on Windows, or the Shift and/or Command keys on Mac.

4. Adjust the remaining Kiosk settings as desired, then scroll to and click ADD.

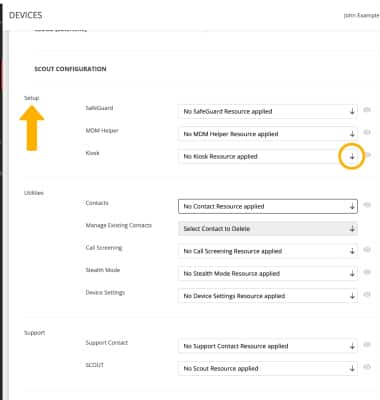
5. To enable the Kiosk profile on the device, from the Sonim Cloud website, click DEVICES. Then click the Edit icon under the desired device.

6. Scroll down to the Setup menu. Click the Kiosk drop-down menu, then click the desired Kiosk Resource. Scroll down and click Update when finished. Your device will update wireless over the air.